
This recipe is our family favorite! It is a recipe that I got out of our "Jerusalem" cookbook, and of course I tweaked it. It’s now only 4 ingredients instead of 9 and still out of this world! It's called Mediterranean Meatballs.
Read moreMore Love Is What We Need
My daughter, Abbey, is always looking for gluten free options. (What is it with these Millennials and gluten-free stuff?) Anyway Abbey found this recipe for Banana-Almond Butter pancakes (Of course we tweaked it), and since then it has been our thing. To make matters even better these delicious pancakes don't have grains at all!
Read moreMy Vegan Venture
Guess whose entire family has become vegan and gluten-free. You guessed it: mine! Of course this introduces a couple of challenges. One is that it seems that just about every vegan recipe has over 10 ingredients, and as you know, I only do 4! Secondly, I don’t really like vegetables. (Did I actually admit that?) So I decided to take up the challenge and came up with this savory Kale, Tomato and Rice soup. It’s 5 ingredients, but that’s pretty amazing for a delicious vegan recipe.
Read morePesto Perfecto

We recently made this amazing and flavorful pesto at the home of Brad and Margy Coleman’s in Chicago. Their kitchen was filled with the smell of fresh basil and garlic and it was perfecto! Margy got this recipe from her sister, Liz, who lived in Rome for 20 years. She was a marvelous cook and actually had a job introducing visitors to the local farmer’s markets. Thanks sweet Liz.
Read moreLisa's Lime Chicken
All of us who cook need basic “go to recipes,” and Lisa’s Lime Chicken is definitely one of those for me! My very close friend, Lisa Taylor, often has delicious and doable recipes partly because she had to cook nightly for four strapping boys and her hubby, Jay, and partly because she is just a great cook! Here’s what you’ll need:
1 & 1/2 teaspoons of dried thyme
1 lb. of chicken breasts
1/4 cup of fresh lime juice
2/3 cup of chicken broth
Opt., rounded 1/8 of a teaspoon of cayenne pepper
Step 1. Combine dried thyme with 1 & 1/4 level teaspoons of garlic salt, 4 cranks of black pepper (and cayenne pepper, if desired)
Step 2. Wash chicken breasts (or chicken breast tenders) and completely dry with paper towels. Using a bit of olive oil in a frying pan, brown bottom side of chicken breasts on medium high heat.
Step 3. While chicken is cooking sprinkle half the mixture on top of the breasts. Turn chicken over and sprinkle other half of chicken on top and continue to cook.
Step 4. Once chicken has browned on both sides, add lime juice and chicken broth all around sides of chicken. Turn heat on very low and cover until ready to serve.
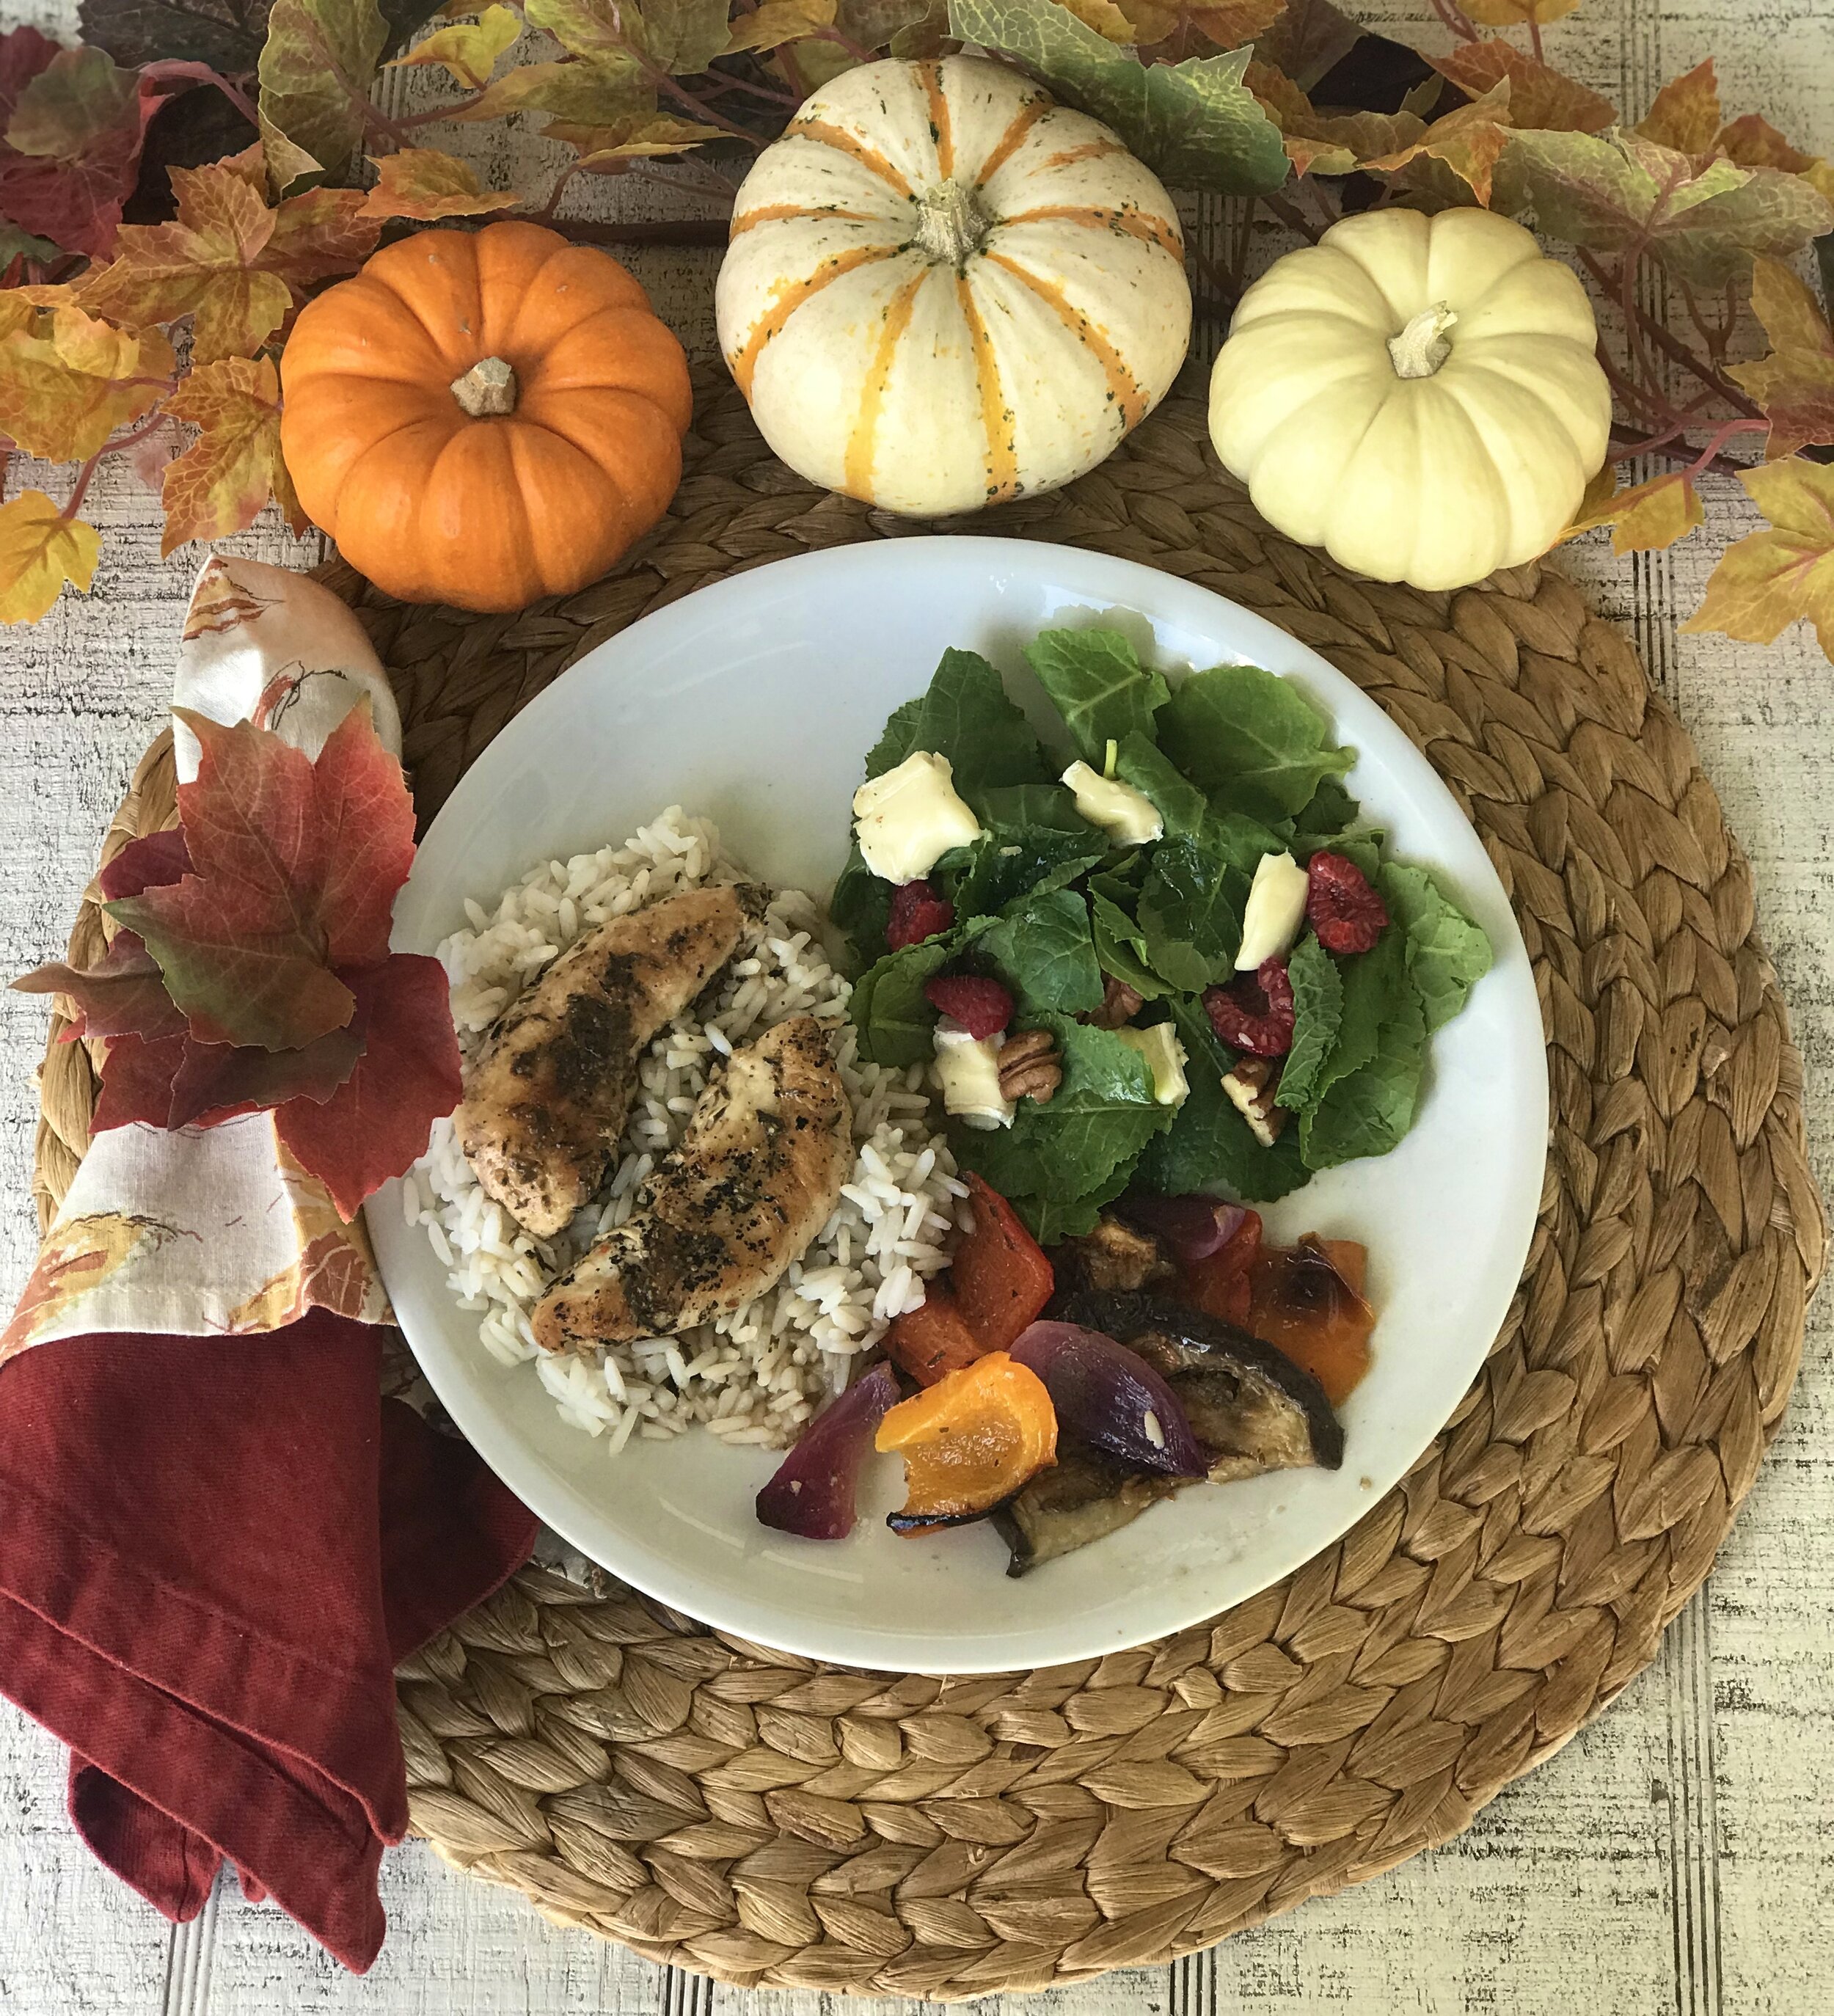
Brie and Raspberry Salad
The salad above is made with baby kale and/or spinach, brie cheese, raspberries and pecans. The dressing is Brianna’s Blush Wine Vinaigrette. Simply Delectable!
Roasted Vegetables with Italian Dressing
There is a great restaurant near us called Garduno’s that brushes their grilled eggplant with their homemade Italian dressing. We often buy a pint of their dressing and use it to brush on our eggplant, bell pepper, red onion etc., before we grill or roast them. When we don’t have their dressing, we have used Ken’s Steak House Aged Romano Italian or Bernstein’s Italian with extra shredded parmesan and fresh finely minced garlic. Superb!
Looking back
It’s the time of year for yummy pumpkin desserts, so I thought we would glance back at last fall’s Pumpkin Spice Cheesecake Bars. They are scrumptious and of course just four ingredients!


Fall is also a fun time for crafts! Above are some Fall Leaf Napkin Rings that I have loved making and using!

Funny Sighting
I was at Trader Joe’s the other day and saw these lovelies among the pumpkins! I wish I could set up a candid camera to see who on earth would buy one of them. I dare you to put one of these on your doorstep:) Perfect for Halloween ‘cause they look kinda scary!
‘Cluck’ or ‘Moo’: It’s Up To You!
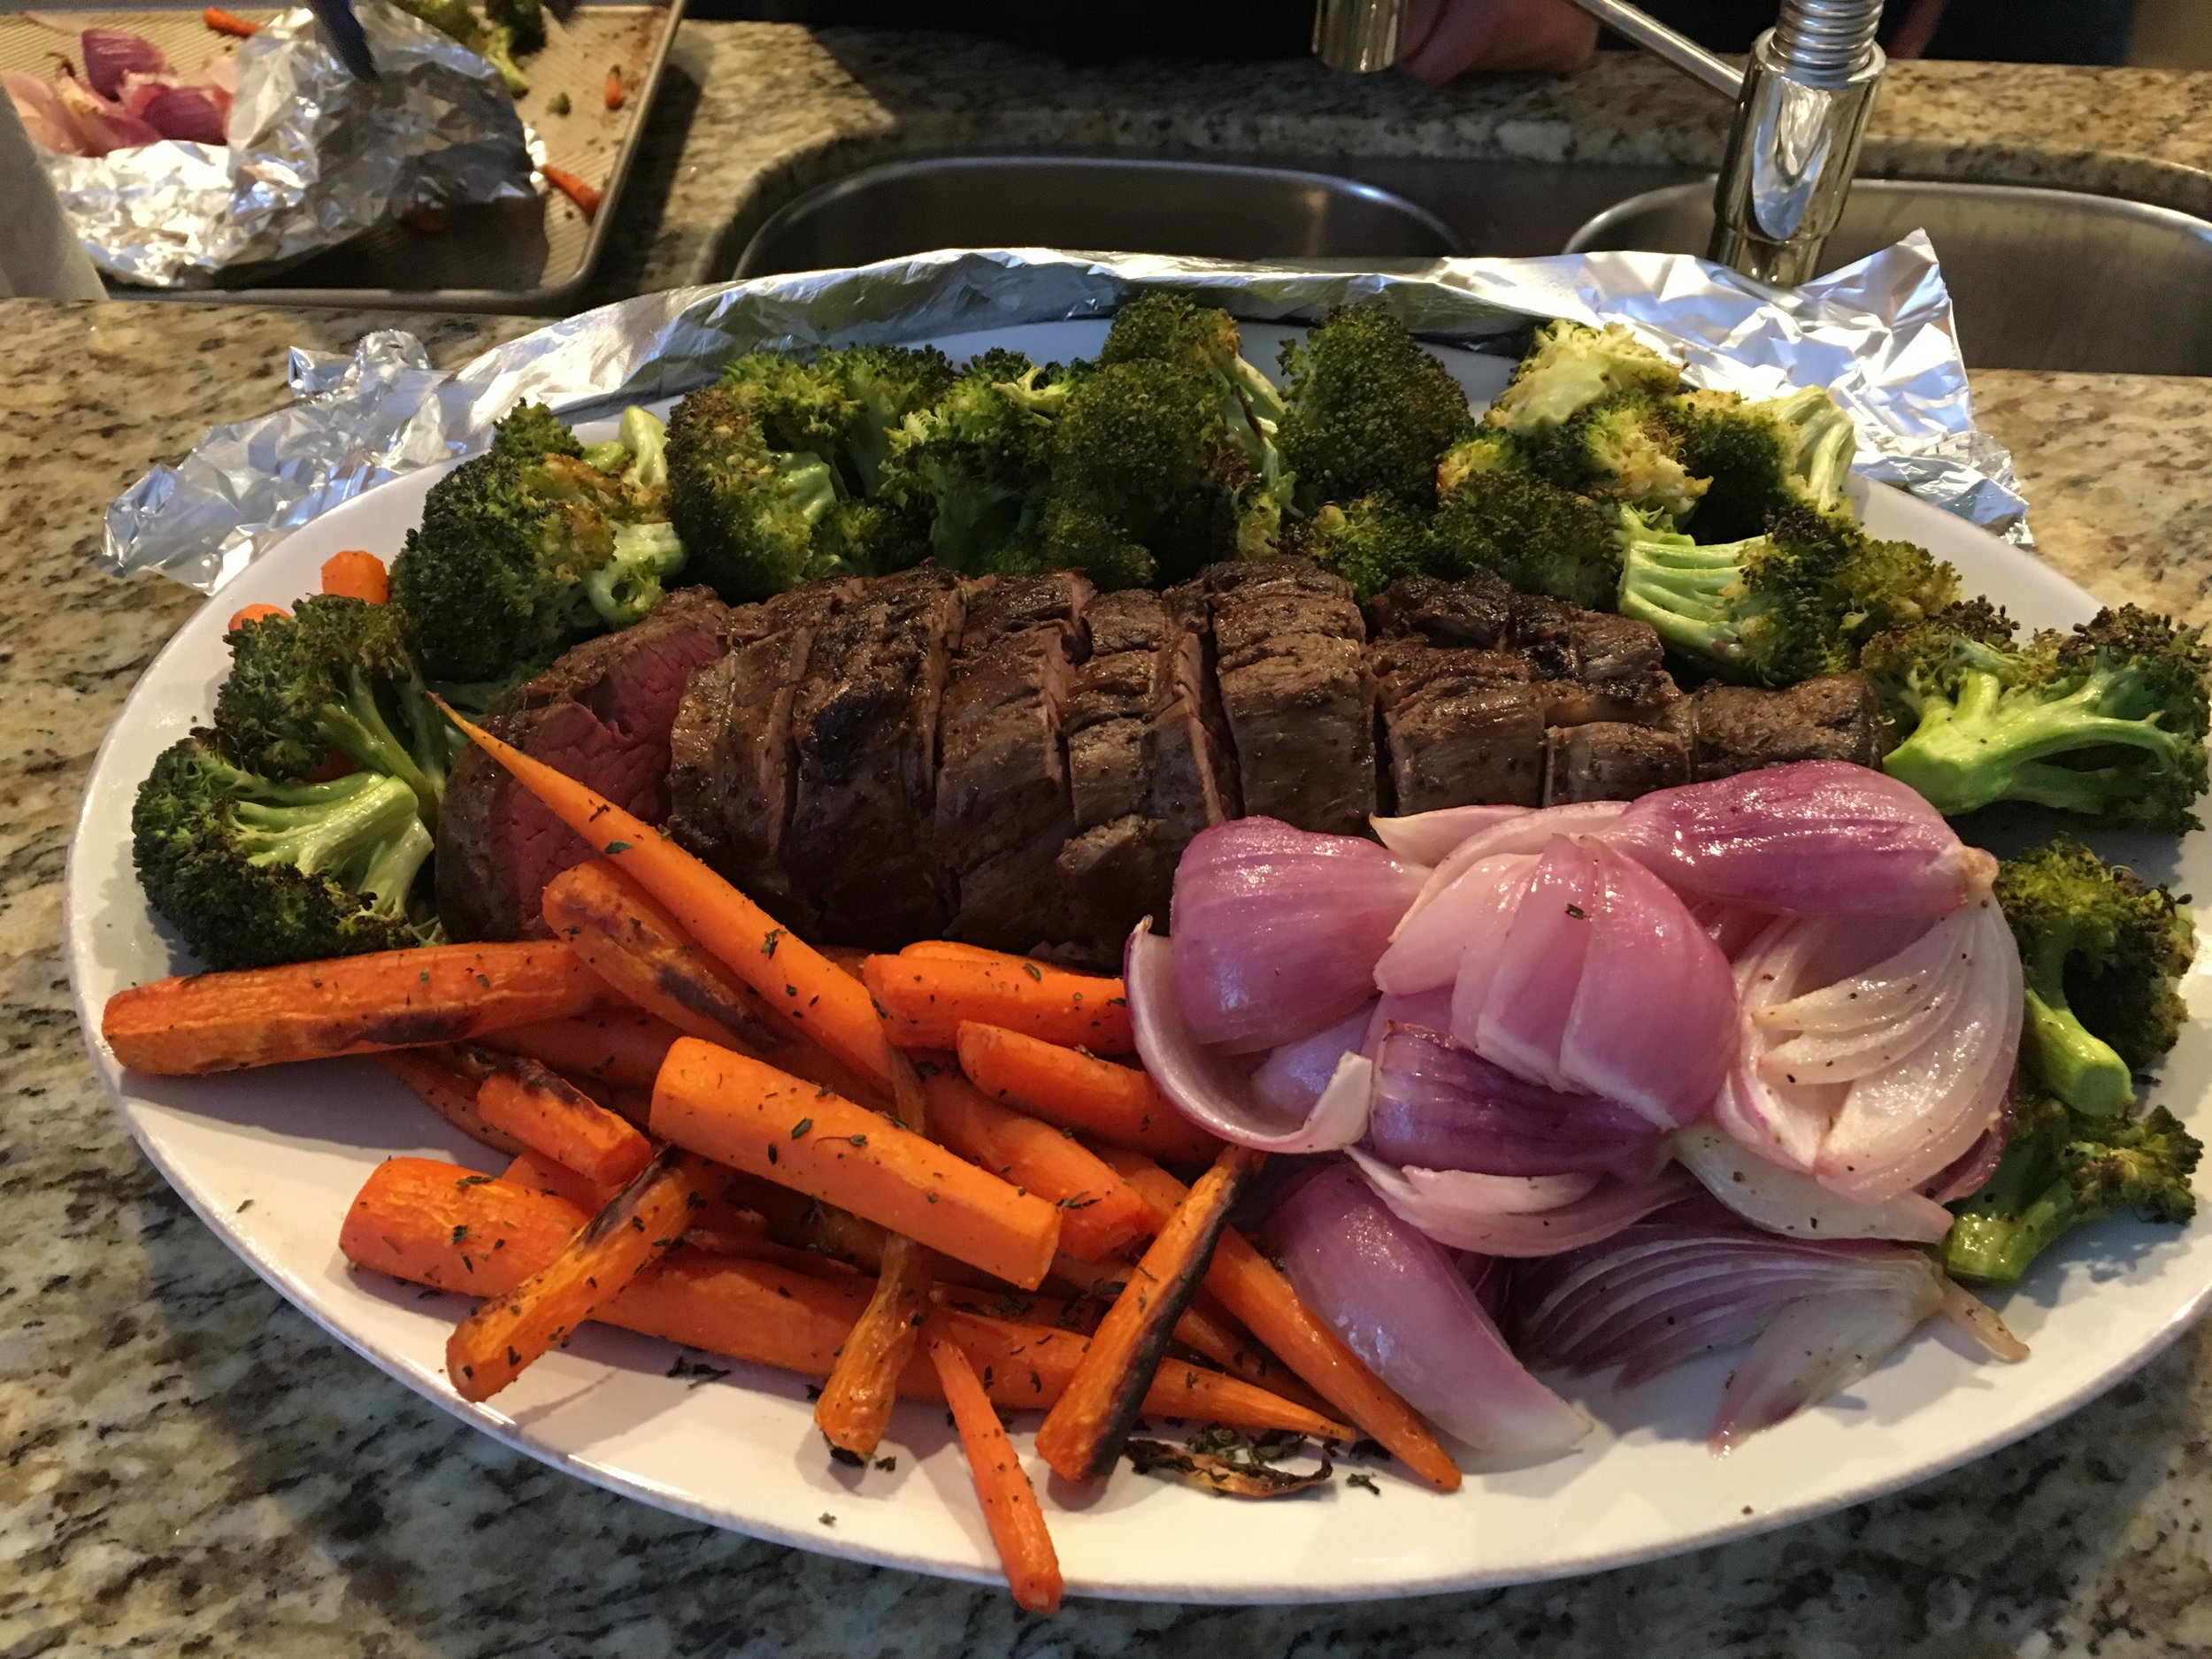
Why is it a bit intimidating to make a whole roast chicken or a pot roast? It seems like a lot of work, but I found that it can be quite easy and the results are a savory roast chicken or succulent pot roast filling your home with wonderful smells! Here are twin recipes with 4 ingredients each:


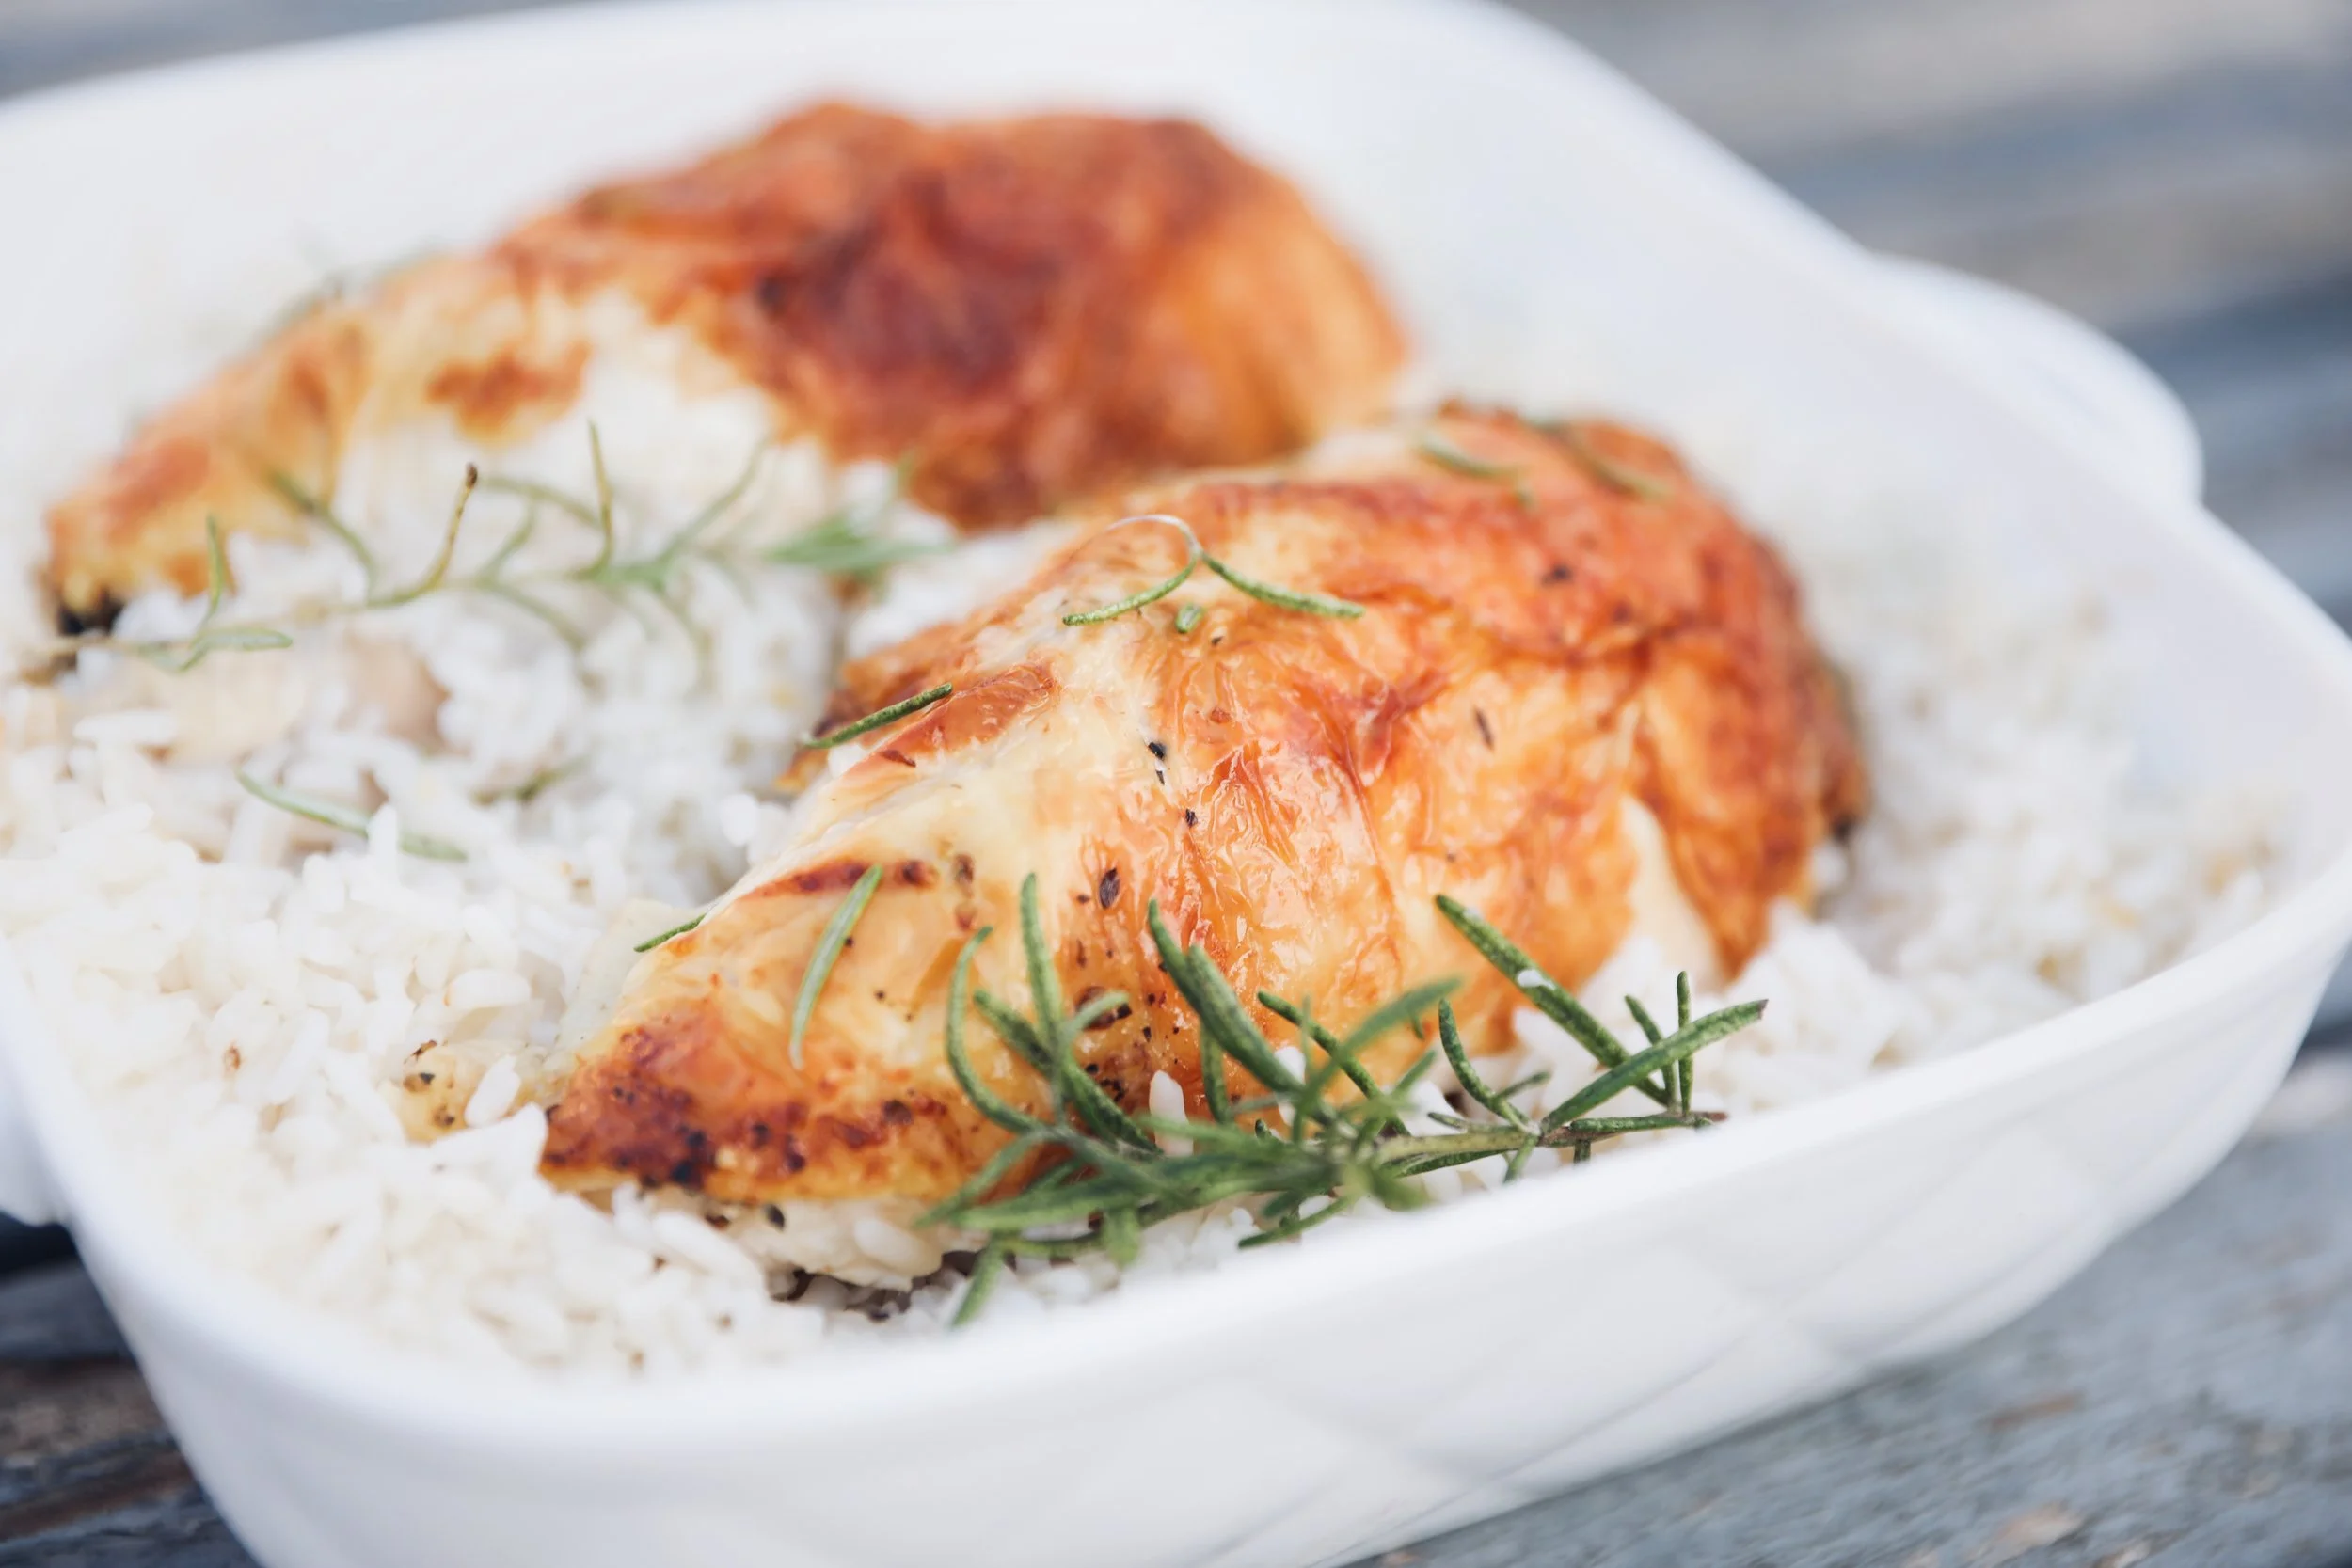
Roast Chicken w/ White Wine & Rosemary
A Whole Chicken
1 & 1/2 cups of warm water mixed with a level Tablespoon of Reduced Sodium Better Than Bouillon (Chicken)
2/3 cups of white wine
Sprigs of fresh rosemary
Preheat oven to 400
Step 1. Remove neck and giblets from inside of chicken and discard. Then rinse and pat dry. Next, place chicken in a large pot (dutch oven), breasts facing down.
Step 2. Mix the warm water with a level Tablespoon of the RS Boullion, 1 teaspoon of garlic salt and 8 cranks of pepper. Next pour this mixture along with 2/3 cup of white wine over the chicken. You then place four rosemary sprigs in the liquid.
Step 3. Roast the chicken for 30 min. then flip the chicken over and roast for 45 more minutes or until a meat thermometer placed in a thigh reads 165 degrees.
*To thicken the gravy you can remove about a cup of the liquid and whisk in 2 Tablespoons of flour. You then microwave this combo for 1 min., whisk it some more, then stir it back into the pot.
*Serve with rice and roasted vegetables or whatever you like and garnish with more fresh rosemary sprigs.
Pot Roast w/ Red Wine & Thyme
This mouth watering pot roast recipe was adapted from one I got from my dear friend Margy Coleman in Chicago. Here’s what you’ll need:

2-3 lb boneless chuck roast
1 & 1/2 cups of warm water mixed with a level Tablespoon of Reduced Sodium Better Than Bouillon (Beef)
2/3 cups of red wine (Chef Margy says the better the wine the better the results:)
Fresh thyme sprigs
Optional: 1-2 lbs of small potatoes and a bag of baby carrots
Preheat oven to 350
Step 1. In a dutch oven heat a tablespoon of oil over med-high heat. Add roast to a large pot (dutch oven) and brown for about 5 min. on each side sprinkling generously as you go with garlic salt and pepper.
Step 2. Stir in broth mixture, wine and 4 thyme sprigs. Cover pot and roast at 350° for 1 & 1/2 hours.
Step 3. Turn roast over, stir liquid, then add carrots and potatoes, (opt.) and roast covered for 1 more hour.
*Garnish with more fresh thyme leaves (after discarding original sprigs) and serve with lots of french bread to soak up the delicious juice!
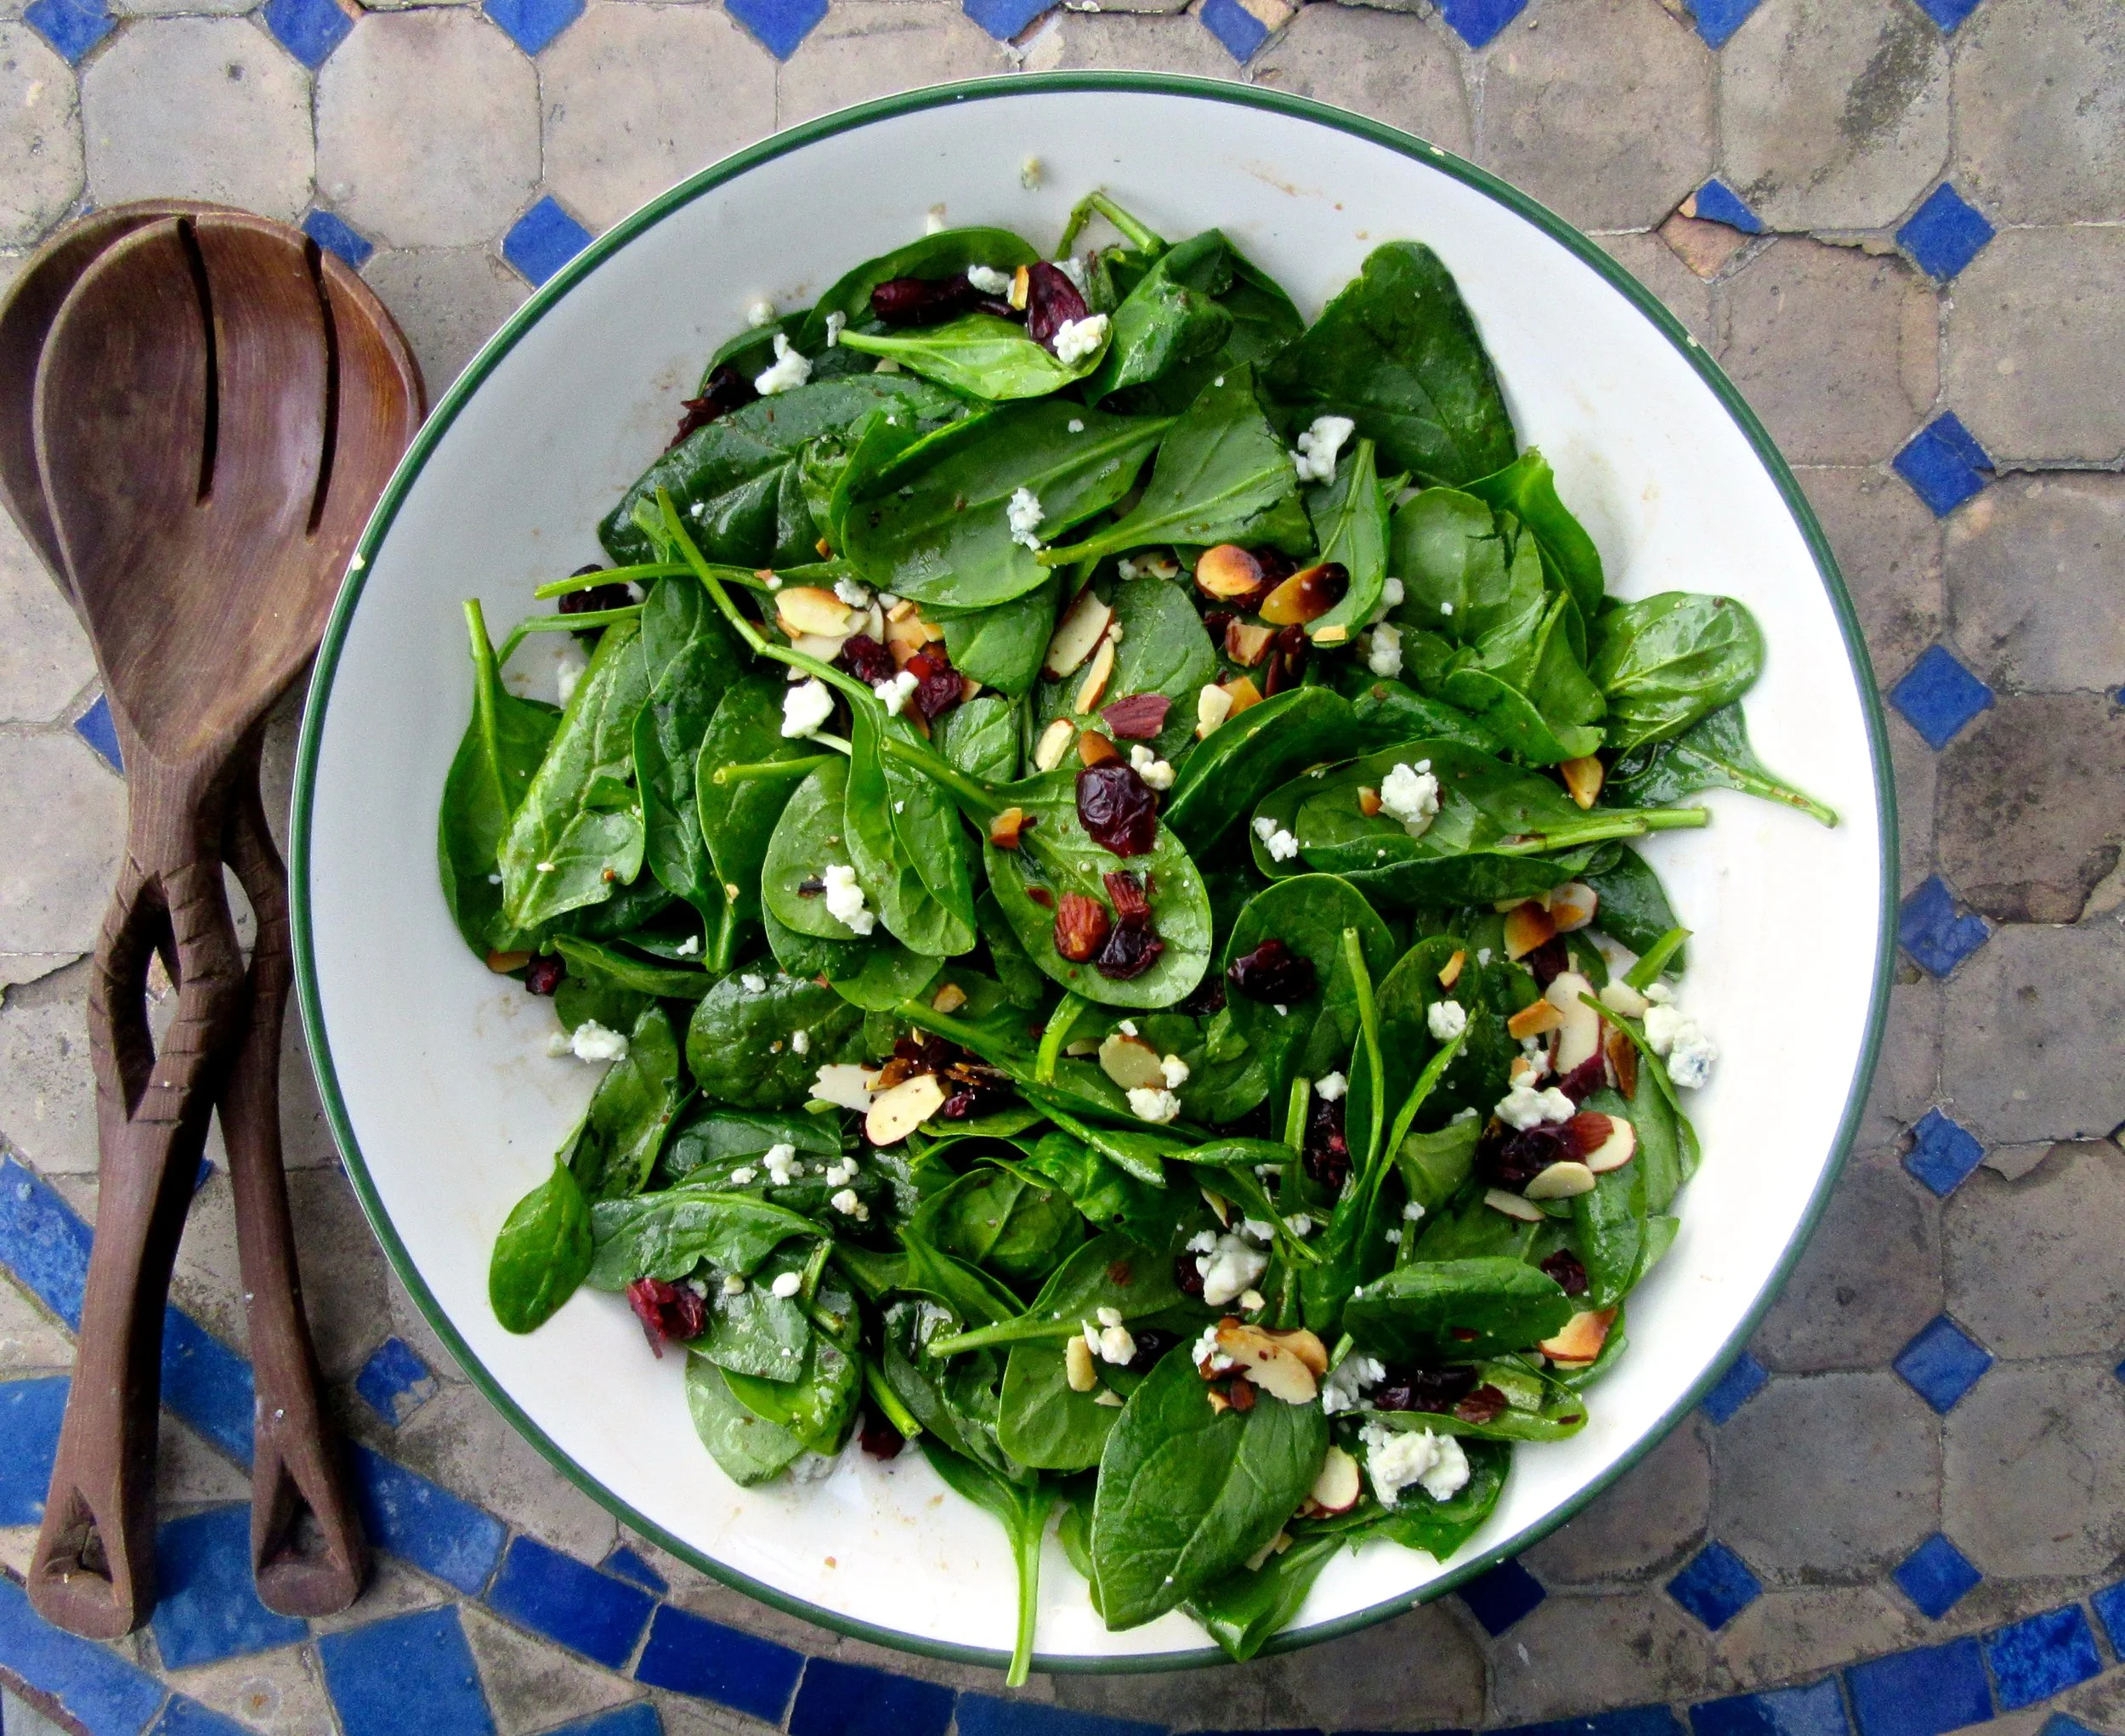
My husband wants a salad every night! (I swear I live with a bunch of rabbits!) Anyway this delectable Sweet and Blue Spinach Salad is a perfect complement to either the roast chicken or the pot roast.
A Little Known Fact about Depression/Anxiety and Cooking!!!
According to Behavioral Neuroscientist Dr. Kelly Lambert of the University of Richmond, regularly making or doing things with our hands (cooking, gardening, creating an art piece, etc.) ignites the “Effort-Driven Rewards Circuit” in our brains, which in turn significantly reduces depression and anxiety! We are doing less and less of these types of things in our instant society today so let’s reverse the trend: get cooking and be happier people!
Check out Dr. Lambert’s podcast : mikemahler.com/podcast/episode-17-lifting-depression-author-kelly-lambert-phd
Colorful Sayings
“Your goose is cooked,” “You’re a dead duck,” “You’re in hot water,” and my personal favorite, “You’re up $%#&* creek without a paddle”—these are all colorful ways of saying, “You’re in big trouble sister!” Gotta love it!
Curry in a Hurry

Did you know that curry powder is actually a blend 8 or 9 different spices? (I know I didn’t!) So glad someone thought of combining everything for us! You can make so many delicious dishes with curry like this savory 4 ingredient Curry Chicken! I adapted this recipe from one I got from my very good friend Debbie Hunter. She is a superb cook! Here’s what you’ll need:

Curry Chicken
2 lbs. of chicken breasts (I like thin sliced.)
3/4 cup of low sodium chicken broth (or 3/4 cup of warm water mixed with 1&1/2 teaspoons of Better Than Bouillon (Chicken- Reduced Sodium)
1 can of coconut cream (Thai Kitchen)
2 level teaspoons of curry powder
Step 1. In a sauce pan on medium-low heat, combine broth, coconut cream and curry along with 1/4 teaspoon garlic salt and 4 cranks of cracked pepper. Let the sauce cook down (thicken) stirring occasionally. (If you can only find canned coconut “milk”, you will need to let the sauce cook down for quite a bit longer.)
Step 2. After the sauce has thickened, set it aside leaving a bit in the pan. Next add a thin film of oil to the pan. Using kitchen scissors, cut chicken breasts into small pieces, place in sauce pan and brown/cook on medium high.
Step 3. Serve the chicken over white rice, pouring the sauce on top. We also love to add chopped cranberries, sweetened/shredded coconut and sliced almonds for sweetness and texture. If you want sweetness and don’t want to deal with the toppings, you can stir in a teaspoon or so of sugar. (Serves 6 to 8)
*Take my word for it: DON’T USE RED CURRY!! it’s “too hot,” just like my husband’s favorite movie clip!
Looking Back
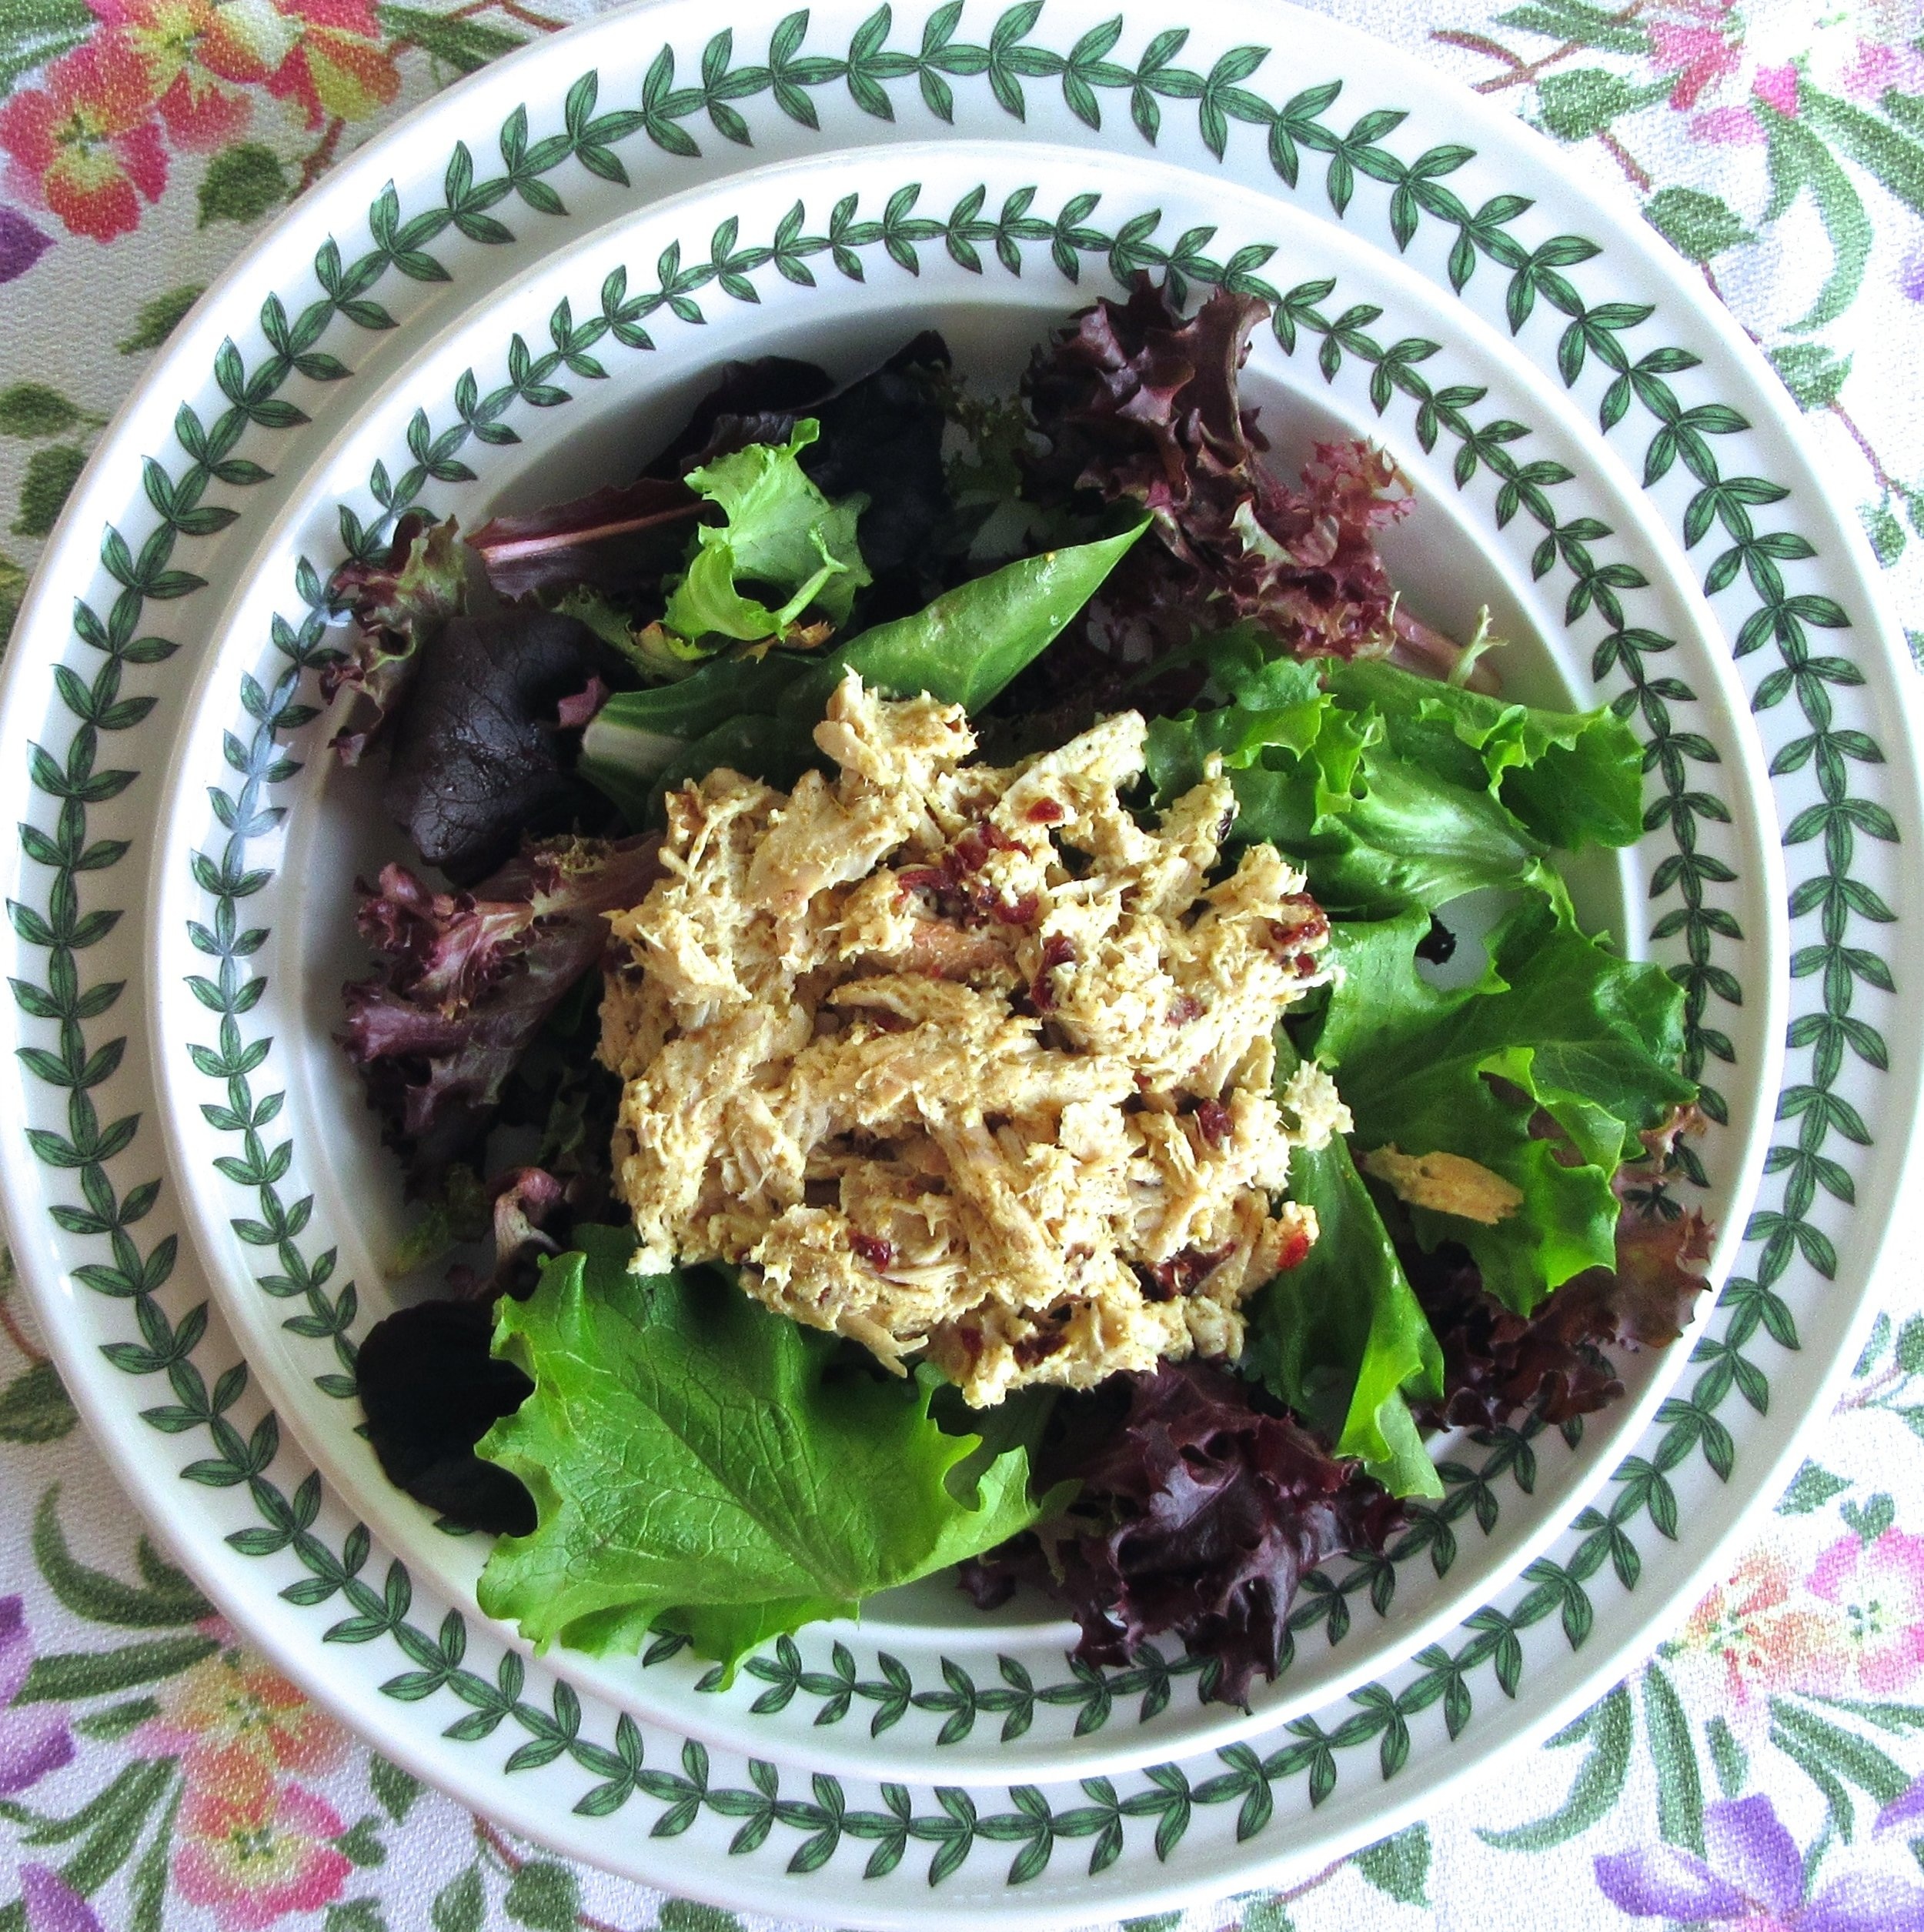
A couple of springs ago, Pickett’s Pearls had a delicious 4 ingredient Currry Chicken Salad! Perfect for a special lunch! I drizzle balsamic dressing on the bed of lettuce and serve the salad with Parmesan Crisps!
Good 4 Alfredo

The story goes that Alfredo sauce got its name from Alfredo di Lelio, who in 1908 was trying to come up with a dish that would please his pregnant wife. I like this guy already! He brought it from Italy to America in 1914 when he opened a restaurant in New York City from which his fame (or that of his dish!) spread. How can you go wrong with chicken covered with a sauce made of cream, parmesan cheese and white wine? You can’t! Here’s what you’ll need for this divine, 4 ingredient version:

1 & 1/2 lbs. of chicken
1& 1/2 cup of heavy cream
2/3 cup of dry white wine
2 cups of grated or shredded parmesan
Step 1. Put a skillet on medium low heat and stir in the wine and cream.
Step 2. Very slowly stir in parmesan cheese until the cheese melts. (This takes a few min. of continuous stirring.)
Step 3. Finally stir in 1/4 teaspoon of garlic salt and 6 cranks of pepper. (If the sauce won’t get smooth enough, you can put it in a blender or if it gets too thick, you can re-warm it. If it’s still too thick, add a little chicken broth.)
Step 3. Spoon the sauce into a small pitcher and set aside. (Don’t clean out the frying pan because you will use it along with the sauce residue to cook the chicken. This gives the chicken a little extra flavor.)
Step 4. Wash and pat dry the chicken breasts and cut in large bite sized pieces .
Step. 5 Cover the bottom of the frying pan with a thin film of oil and cook the chicken pieces on medium high until done. (Once they are done on one side, turn them over so they will brown on both sides.)
*This Chicken Alfredo can be served over pasta and/or stir-fried vegetables (broccoli florets, chunks of red onion and pieces of bell peppers make a great combo for this dish!). If you are doing vegetables, start stir-frying the bell pepper first, then add the onion and finally the broccoli.
Harvest Candle Holder
Every time I go to Pier 1 I get ideas for crafts I want to do. Last time it was a Harvest Candle Holder. Totally easy to make! I will probably put it on our long Pickett family Thanksgiving table with flower arrangements on each side! Here’s what you’ll need:

A Hurricane candle holder (I get them from World Market for $4!)
Candle
Artificial leaves, berries, small pine cones etc.
Gold Spray paint
Cardboard
Glue gun and sticks
Step 1. Trace the base of the candle holder on the cardboard and cut the cardboard about 1 & 1/2 inches wider than the tracing.
Step 2. Spray the cardboard piece with gold spray paint and if you want, the pine cones.
Step 3. With the candle holder centered on top of the cardboard, begin gluing on the foliage in whatever design you want.
Step 4. When you are done, with your hand underneath, very carefully move the candle holder where you want it to place it. (Some of the foliage will be stuck to the candle holder. This is fine because it helps keep it in place.)
Step 5. Put the candle inside and enjoy! (Now, I’m excited to do one for Christmas!)

Looking Back
If you want ideas for other easy holiday crafts, check out some of last year’s posts on how to make Fall Napkin Rings, Christmas Napkin Rings and Holiday Coasters.


Fantastic Fajitas
My family loves fajitas (who doesn’t?) so I make this 4-ingredient version all the time. (As I’ve confessed before, I’m a wee bit lazy, so me and the whole 4 ingredient thing are a match made in heaven.) Here's what you'll need for these fantastic fajitas!

1 to 1 & 1/2 lbs. of chicken breasts or flank/ skirt steak
2 peppers (red, yellow and/or orange)
1 red onion (Red onion is sweeter, adds color and saves some tears.)
1 pkg of fajita mix (We like Frontera Skillet Sauce - If you want you're sauce spicier just add a bit of chili powder.)
Step 1. Wash, completely dry and cut the chicken or steak into large bite sized chunks.
Step 2. (Opt.) Put the meat chunks in a zip lock with a little of the fajita sauce and marinate in the frig. for 30 minutes to 3 hours.
Step 3. Chop the red onion and peppers into large bite sized pieces.
Step 4. You then saute the onion and peppers in a skillet covered lightly with a thin film oil. Once they are cooked (but still firm), set aside and cover tightly with foil.
Step 5. Remove only the meat from the bag and discard the bag with sauce in it. You then saute chicken/steak on medium high in a skillet covered with a thin film of oil. Once meat is done add the vegetables and the fajita sauce. Once entire dish is warmed up, turn heat down to low and serve. (Serves 4 to 6)

You can serve the fajitas by themselves, over rice or with flour tortillas. We always eat ours with an awesome and very simple guacamole recipe (that my sister's chef makes) and sour cream or greek yogurt.
Hilarious Story
My oldest just returned from visiting Ireland. Her trip reminded me of a story my husband heard when he was living there. His Irish friends were hosting some visiting nuns from America. After the sisters had landed in Dublin, they said, “We’re so glad to get off that plane; our fannies are killing us!” Do I need to tell you that what we Americans refer to as our ‘fannies’ is for the Irish a nearby but totally different body part?! Todd’s Irish friends could not stop laughing, and Todd and I are still laughing.
Smothered Salmon
The Pickett family looooves salmon, so I'm constantly on the look out for new ideas. Here's a 4-ingredient recipe that has batted a 1000 lately. This is the way a friend of mine makes salmon, which actually only started with 3 ingredients. I added the chopped tomatoes for extra taste and color (and because I get to use 4 ingredients!). My family assured me that the tomato addition was a great one. Yours truly doesn't actually eat anything that swims. (Probably because when I was growing up the scent of my mother's oil packed tuna was always wafting through the house.) Anyway, for you salmon lovers, this is what you'll need:

2 pounds of fresh salmon
Mediterranean Garlic Marinade by Scott's (pesto works as well.) 1/2 cup +1/4 cup
1/4 cup of Balsamic Glaze by Trader Grotto's (Rachel Ray's Balsamic Reduction works also.)
2/3 cup of chopped grape or cherry tomatoes


Step 1. Cut the salmon in 1/2 lb. pieces, put them in a baking dish or large plastic bag and cover the pieces with about 1/2 cup of the marinade. (Ideally you would marinate the salmon for a few hours.)
Step 2. You then cut the tomatoes into small pieces and mix them with 1/4 cup of balsamic glaze and 1/4 cup of marinade. (This mixture will be spooned onto salmon later.)

Step 3. Preheat grill on medium high. With foil, create 2 rectangular "trays" folding up the foil to create sides. These "boats" will prevent liquid from seeping out. Or better yet, line a grill basket (that has a handle) with foil. These grill baskets are one of Pickett's Pearls Glorious Gadgets. They are great for barbecuing shrimp, veggies etc. as well as salmon.
Step 4. You then spray inside of the foil with cooking spray. Next place salmon covered with marinade into foil trays or foil-lined basket then generously spoon tomato mixture on top.
Step 5. Place salmon on the grill. Cook for about 10-12 minutes (depending on thickness) until it flakes easily with a fork. (No need to turn it.) You can serve salmon with its skin on, which will be nicely charred underneath. If you don't like the skin, the filets lift easily off it with a spatula.

Looking Back
A couple of Easters ago Pickett's Pearls featured Salmon with Lemon and Dill, the go-to salmon recipe for the Pickett family. Check it out!
Funny Encounter
Not too long ago, I was at a gas station about to pump gas when I got a phone call. I took the call and because I'm a hideous multi-tasker, I forgot to start the pump. A biker who looked about 75 complete with long gray beard, leather jacket and tattoos rolled right up to me and started revving his huge motorcycle. He said to me, "Lady are you gonna fish or cut bait?" I said "fish" and got to pumping. Normally I hate when people are irritated with me, but this time it was just plain funny. At least he didn't say, "Lady, if you aren't gonna to p. . . then get off the p. . . !"
Savory and Succulent
Chicken and Garlic Croutons! We recently had this heavenly chicken dish for Easter, then we had to have it for Mother's Day. We just can't get enough of it. Talk about finger lickin' good! Here's what you'll need:

- 1 french baguette
- 1 medium to large sized roasting chicken
- 1 navel orange, halved
- 4 garlic cloves, minced
Step 1: Preheat oven to 450°.
Step 2: Cut baguette into 1 inch slices and then cut in half forming big chunks. Place bread pieces on a baking sheet. Bake at 450° for 5 minutes and set aside.

Step 3: Remove giblets and neck from chicken then rinse and pat dry. Trim excess fat, place on a baking sheet with sides and sprinkle with salt and pepper.
Step 4. Squeeze orange juice into a pitcher or measuring cup. Next pour the juice into the cavity then place an orange half in the mouth of the cavity.
Step 5. Insert meat thermometer into meaty part of thigh, making sure not to touch bone. Bake chicken at 450° for 50 minutes or until thermometer registers 180.
Step 6. Remove chicken from the pan and put it on a platter careful to preserve juices including orange juice from inside the chicken in the original pan. Next cover chicken with foil and let stand 10 minutes.
Step 7: Pour the drippings from the pan into a pitcher or measuring cup then stir in the minced garlic. Arrange croutons back in the pan and drizzle drippings and garlic over croutons, stirring to coat. Bake at 450° for 5 more minutes. Remove and arrange croutons on the edge of the platter around the chicken and serve.
(Serves 4)
Looking back

One of the first Pickett's Pearls posts was about Apricot-Pesto Chicken. It is a totally mouth-watering dish and you won't regret it if you give it a try.
Fun Saying
Lots of fun sayings have to do with cats and dogs like this one:"You're the cat's pajamas". What an odd way to say you're cool. It's hard to picture a cat in pajamas. A dog maybe, but not a cat.
Vegetables All Dressed Up

It's definitely time for a blog about vegetables! The past few Pickett's Pearls posts have been about goat cheese/apricots appetizers, chicken tacos and Key Lime pie. I will admit that I don't love vegetables, (please don't tell my mother) and so the dishes I've chosen have some other yummy ingredients such as bacon. Oops!
Cauliflower with Irish Cheddar Sauce

Ingredients:
A large head of cauliflower. ( I used purple 'cause it's a fun color!)
1+2 tablespoons of butter. (I'm a salt fiend, so I always go with salted.)
1/2 cup of half & half. (You could probably use whole milk for less calories.)
1/2 cup of Irish Cheddar (like "Dubliner"--we are addicted) or other cheddar. (See how to shred the cheese below.)
- Preheat oven to 400F.
- Cut the cauliflower into small pieces.
- Toss with 1 tablespoon of melted butter. (I clump it together and toss it right on the cookie sheet.)
- Roast the cauliflower for about 20 to 25 minutes.
- While cauliflower roasts, make the cheese sauce.
- Shred a 1/2 cup of the cheese on the next to finest setting. (This helps the cheese melt.)
- Melt 2 tablespoons of butter in a small sauce pan on medium low, then whisk in a 1/2 cup of half & half. Once the mixture is hot, slowly whisk in the 1/2 cup of finely shredded cheese until melted and well blended.
- Set sauce aside to let it thicken.
- Remove the roasted cauliflower from the oven and place in a small casserole dish, then spoon the cheddar sauce on top.
- Put it into your already hot 400F oven until it is heated through and golden brown on top — about 5-7 minutes. (Serves 4)
Asparagus Wrapped in Bacon
Ingredients:

A bunch of asparagus (thick stalks work much better).
10 to 12 strips of CENTER CUT bacon (which has more meat and less grease)
Opt: Caesar dressing for dipping
1. Wash the asparagus and cut about 1 & 1/2 inches off the bottom of each stalk.
2. Cut each strip of bacon up the middle. You now have a long thin strip for each stalk.
3. Wrap the bacon around the stalks in a candy cane pattern. (Start wrapping at the bottom of each stalk with the widest end of each bacon strip.)
4. Place each wrapped stalk on a cookie sheet, put the pan in the oven, and turn it to 400. (Starting with a cold oven helps the bacon holds its shape.) Bake for 25 to 30 mins. or until bacon is cooked, but not too crispy. (Serves 4 to 6)
Acorn Squash with Brown Sugar Syrup

2 Acorn squash
2 tablespoons of salted butter
4 tablespoons of brown sugar
1/4 level teaspoon of cinnamon
Preheat the oven to 400°F.
- Stand each squash on its end with the stem down and cut the squash vertically using a sawing motion. When you get close to the stem, just crack the squash in half.
- Scrape out seeds and stringy bits – I use an ice cream scoop.
- Stab holes inside the bowl of each squash half using a fork, and move the fork back and forth to create bigger holes.
- Place butter in a very small dish and soften (not melt) for about 10 secs. in a microwave. Mix the brown sugar and cinnamon in with the butter and spoon 1/4 of this mixture into the inside of each squash. (Take the back of a spoon and mush the yummy mixture into the holes you've made.)
- Place in oven on a cookie sheet and roast for 40 to 50 minutes or until a fork can be inserted easily. (Serves 4)
Looking Back
In the past Pickett's Pearls has posted 4 ingredient recipes for other superb vegetable dishes: mashed cauliflower, stir fry asparagus and spaghetti squash. Check 'em out!


Fun Saying
Now that we are on the subject of vegetables, I thought I'd share my very favorite saying: "I didn't just fall off the turnip truck." What a fun way to say that I'm not naive! I can just see someone rolling off a turnip truck as it keeps going down the road. So the next time someone is insinuating that you are gullible, just say with indignation: "Wait just a minute, I didn't just fall off a turnip truck ya know!"
Cinco De Mayo
Wow! Cinco de Mayo is right around the corner, so it’s time to celebrate with all kinds of Mexican food and, of course, margaritas! My friend Lindsay Murad suggested that I make SLOW COOKER CHICKEN TACOS because the chicken turns out, oh so tender. I can’t even think of a time I've made tacos at home. Maybe that’s because being from Alabama, I'm definitely not a Mexican food connoisseur!
Slow Cooker Chicken Tacos

My family loved these 4 ingredient chicken tacos. They didn’t even mind eating them 3 nights in a row while I experimented with different recipes. Here’s what you’ll need:
3 chicken breasts
1/2 a package of McCormick Chicken Taco Seasoning or McCormick Slow Cooker Chicken Taco Seasoning. (What I like about McCormick’s is that it has chili pepper and cumin in it!)
Corn Tortillas (We like white)
Guacamole or salsa (Any kind such as classic or mango)
Opt. Mexican cheese blend or cotija cheese
First cut up chicken breasts into small chunks and put into a crock pot on high. Mix a 1/2 package of the taco seasoning with a 1/2 cup of warm water and add to crock pot. Slow cook for 3 to 3 & 1/2 hours. When done shred chicken with 2 forks. Turn pot off and re-cover until ready to serve.
Warm the tortillas in tin foil in an oven or in a skillet on each side with a bit of olive oil or a pat of butter. Scoop shredded chicken into warm tortillas and top with ready made guacamole or salsa. If you want to go the homemade route, last summer, Pickett's Pearls posted (4 ingredient) recipes for totally yummy mango salsa, classic salsa and guacamole.
TRY 'EM YOU'LL LOVE 'EM!


And let's not forget the margaritas! Check out these three "Marvelous Margaritas" from last Cinco de Mayo's post!
Funny Mexican Sayings
Every country has it's colorful sayings. I thought it would be fun to look at some Mexican ones.
Instead of saying : You're really blind . They say: Si no ves tres en un burro. (You can't see three men on a donkey!)
Instead of saying: His memory stinks! They say: Él tiene la memoria de un pez. (He has the memory of a fish!)
Instead of saying: She certainly doesn't mince words! They say: Ella habla sin secador en la lengua ! (She has no hair on her tongue.)
Cloudy With A Chance of Meatballs
Meatballs are good anytime of year especially in the winter months when they can bring warmth to our tables. Here's a recipe that you can use over and over and, of course, it has 4 ingredients! Here's what you'll need:

A pound of ground turkey or beef (Our family prefers turkey.)
1/4 cup of finely chopped onion.
1&1/2 teaspoons of Italian herbs
Marinara Pasta Sauce
(Opt. 1/8 of a teaspoon of red pepper flakes)
Preheat oven to 400. Mix all the ingredients in a bowl with 3/4 teaspoon of garlic salt. Cover the bottom of a skillet with a thin layer of cooking oil and heat on medium. Shape mixture into 1 & 1/2 inch balls then place them in the hot skillet and brown them on both sides. You then place the meatballs on a cookie sheet and bake them. (Beef meatballs can be cooked for 5 to 7 min. and turkey meatballs need to be cooked for longer--7 to 9 min.--to make sure they are cooked all the way through.) Add meatballs to warmed Marinara Sauce and serve over pasta or spaghetti squash.
TRY ‘EM YOU'LL LOVE IT!
The Scoop on Marinara
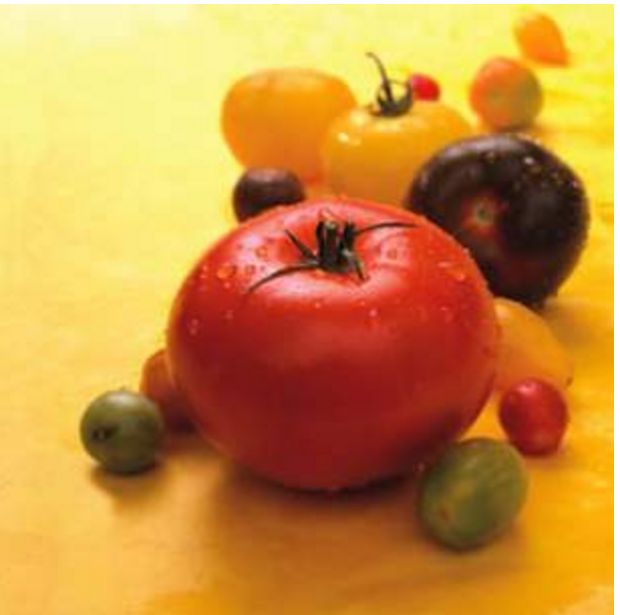
“Mariner’s” sauce originated in Naples; nobody’s sure how it got its name but one theory is that it was invented by mariners returning from the Americas with a newly discovered fruit, the tomato, in the 1700s. Funny thing is that even though a tomato is technically a fruit because of it's seed structure just like zucchini, in 1893 the Supreme Court ruled tomatoes as vegetables. Now I'm all mixed up in the tomato department!
Eenie Meenie Miney Mo? (Yes, this is how you spell that.)

How do we know what Marinara sauce to use? The Chicago Tribune did a blind taste test with 12 marinara sauces. Two of the sauces pictured tested in the top 3. Rao's was #1 and Riserva was #3. (Both can be found at Target and Walmart who by the way seem to carry everything!) There is also pictured "Farmer's Market" by Prego which wasn't one of the ones tested I just like farmer's markets.
We recently had our good friends Lara and Skip Lanfried (Newport Beach) over and, of course, I made us all taste test the three marinara sauces pictured. Two of us chose the Riserva, two of us chose "Farmer's Market" and no one chose the Rao's. (Of course, our palettes may be lacking just a bit.) I do think it's interesting that the Rao's costs $10 which is more than double the cost of the others. You can buy a shirt for that!
Looking Back Middle-Eastern Meatballs

Middle-Eastern Meatballs
Last May Pickett's Pearls had a post on Turkey and Zucchini Meatballs. A major favorite around the Pickett home!!! They are superb! You should check 'em out if you haven't already.
Get Cozy
It's the time of year to wrap up in a blankie in front of a fire and eat soup. I've had this "Chicken and White Bean Soup" recipe for years, but I have no idea where I got it. It's a favorite in the Pickett household. Here's what you'll need:

1 quart of chicken broth
2 cans of Great Northern White Beans
3 cups of shredded chicken. (We use roasted chicken from our grocery store.)
2 teaspoons of coriander
Opt. 1 small can of mild green chilis
*Top with a dollop of sour cream or plain greek yogurt and/or parmesan cheese
To make this soup I start with a roux. Go to the blog post "Ritzy Cream Corn" to learn how to make a roux. Once you have mixed half the broth and the roux together and smushed any lumps, transfer the liquid to a pot. Next stir in the rest of the broth, 2 cans of white beans (drained), 3 cups of shredded chicken and the coriander. Sometimes I also add a small can of green chilis, but that isn't necessary.
Looking Back

This tortellini soup has been one of the most popular of all the Pickett's Pearls recipes, and it is super, super easy to make. It is will be perfect to serve on Super Bowl Sunday or any other cold winter night.
Stinky Sponge Update
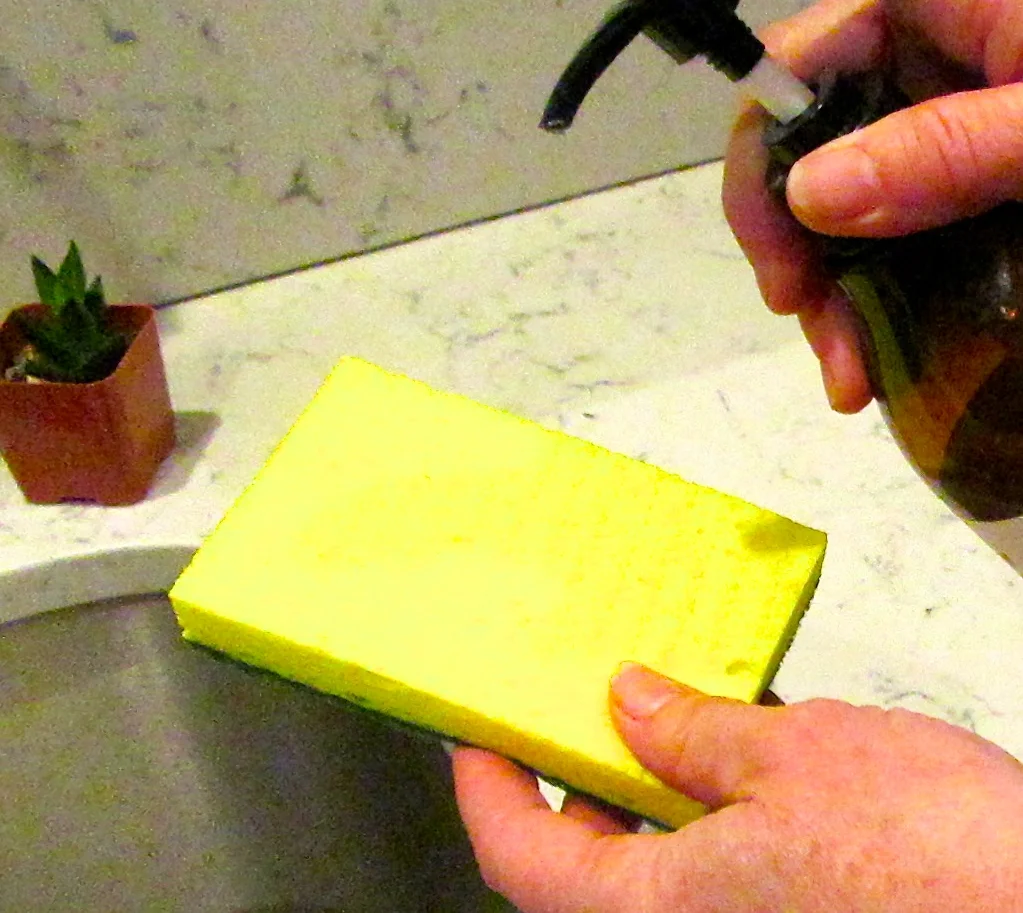
Who isn't grossed out by the icky smell of a used sponge? Last year Pickett's Pearls discovered that the solution to the stink was washing our sponges with dishwashing liquid! Then tragically (at least around the Pickett household) our sponges started stinking again. I thought, "Oh no, I have misled Pickett's Pearls readers!" I went into action and did some more experiments and figured it out! The problem was I had switched to using Dawn instead of Lemon Ajax (even the name Dawn sounds wimpy compared to the tough sound of Ajax! Actually it turns out that the big factor is the lemon.) Anyway now that I have switched back to Lemon Ajax, all is well in the stinky sponge department. Whew!
Soup's ON
A few years ago I was in Paris with some good friends. Believe it or not we still talk about the Butternut Squash Soup that we had at a restaurant called Les Papilles. You may not be talking about this recipe for years to come, but its memorable all the same, and it’s super simple to make! Here’s what you’ll need:

3 cups of cubed butternut squash (Many grocery stores have butternut squash already cubed in their produce section.)
1/4 cup + 2 Tablespoons of chopped red onion
3 cups of low sodium vegetable broth
3/4 cup of half and half or light coconut milk. (The coconut milk will give the soup a sweeter taste and make it vegan.)
Step 1. Small cubes of squash cook faster, so you may want to re-slice your cubes into 1/2 inch pieces.
Step 2. Cover a large sauce pan with a thin film of oil and saute the onions on medium until they are translucent.
Step 3. Add vegetable broth, cubed squash, half & half (or coconut milk) along with approx. 1 & 1/2 teaspoons of garlic salt and 8 cranks (or so) of pepper.
Step 3. Bring to boil then simmer mixture until a fork goes through the squash easily.
Step 4. In a blender or food processor puree mixture entirely. (If it’s too thick, add a bit more vegetable broth.)
*Garnish however you like or not at all. It’s great served with French Bread but what isn’t. (We put croutons and bacon on top - delicious!)
Serves 6
**My daughter’s best friend, Krysia, tasted this recipe and promptly added curry powder to it. Curried Butternut Squash Soup is quite common. If you’re so inclined, just add curry to taste (about a Tablespoon).
Looking back
Pickett’s Pearls has featured lots of yummy soup recipes, and of course they are all only four ingredients! Tortellini Soup, Southwest Soup and Chicken and White Bean Soup.
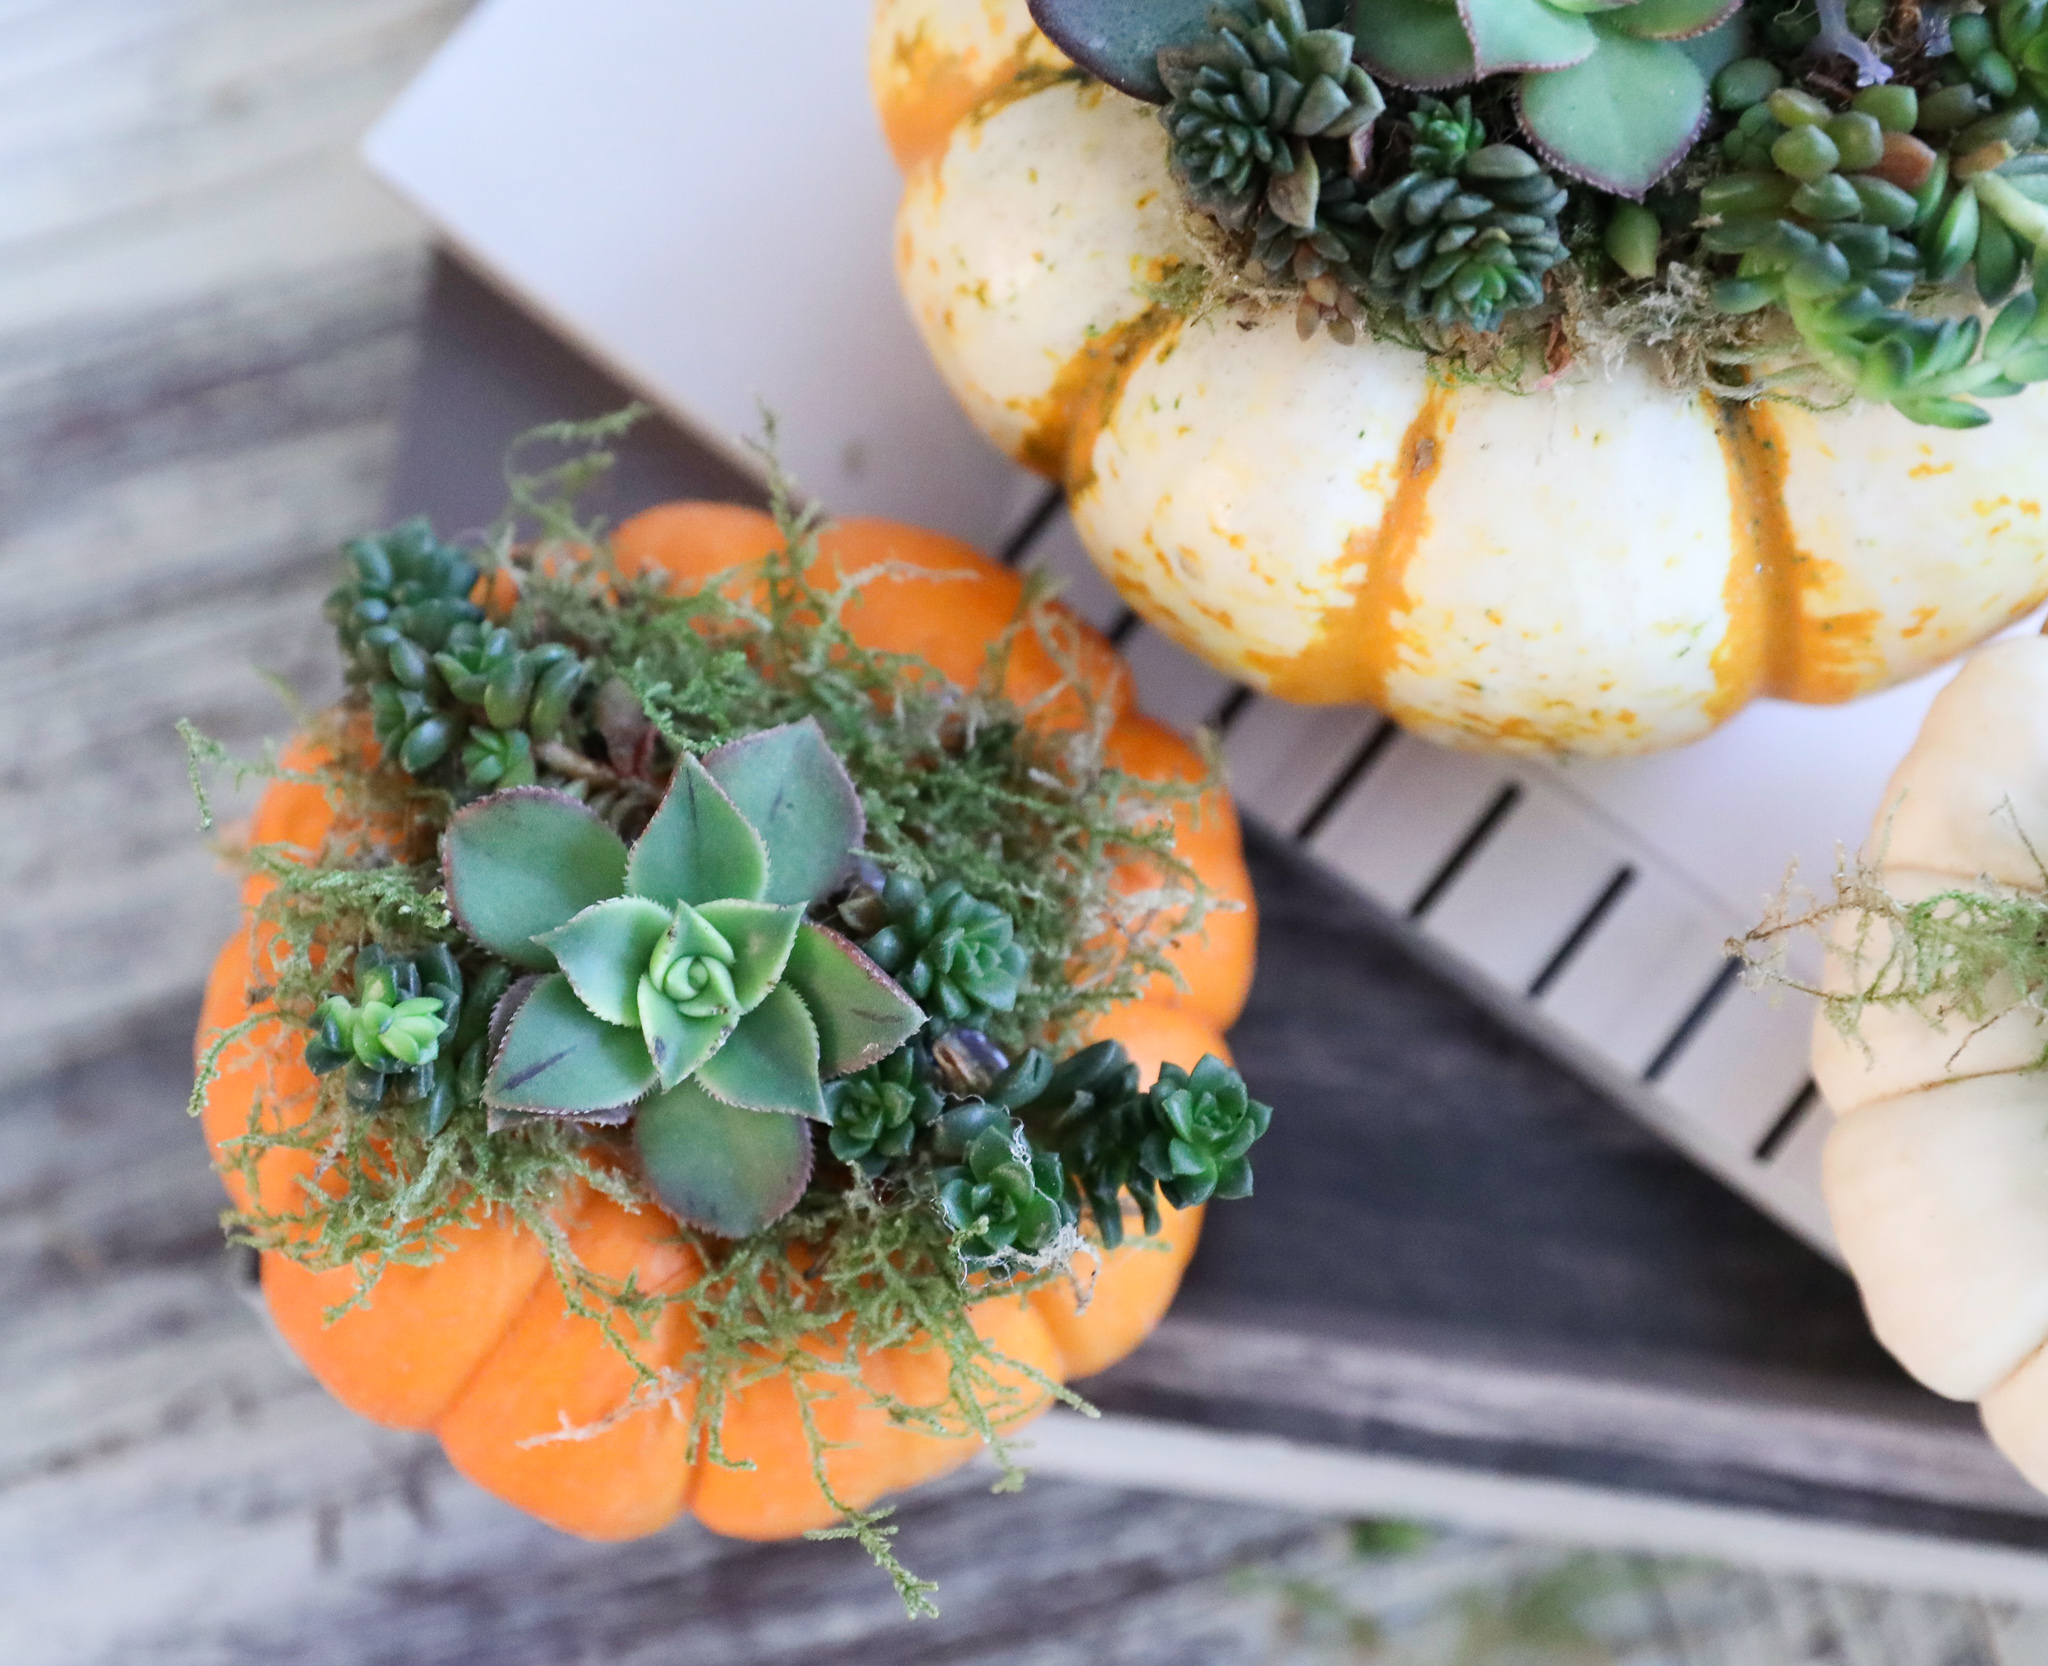
Dress Up Your Pumpkins


My good friends Jill and Lisa were the first ones to introduce me to these dressed up pumpkins. Not only are they precious, they are super easy to make. All you need is:
Any sized pumpkins (try to find ones that have no holes.)
Dried moss from a craft store
Various kinds of succulents (the least expensive way is to get a pot filled with multiple kinds.)
Hot glue gun and sticks
Scissors
Serrated knife
Step 1. If the pumpkin has a long stem, carefully saw it off, but not so low that it cuts the pumpkin in any way.
Step 2. Arrange some of the moss so that it covers a large portion of the top and use the hot glue gun to glue it down.
Step 3. Decide which succulents you want to use and cut the stems so that there is only a bit left on each bud (approx., 1/4 in. for baby pumpkins, 1/2 in. medium sized etc.)
Step 4. Arrange the succulent buds on top of the moss and glue each bud down. (If you have leaves that have come off, you can glue those in as well.)
Step 5. Spritz them with water every week or so. Lisa’s succulent pumpkins have lasted 2 years!! (She told me the other day that they must thrive in hot glue. Who would have thunk?)
** Did you know that you can take succulent clippings, just stick them in moist dirt and they will take root and grow? It’s like magic!
Fun Saying
I can always depend on my friend Lisa who was raised in Montreal to tell me funny French sayings. The latest one she shared was, “Revenons à nos moutons” which someone says when they want another to return to the subject at hand. The funny thing is that it literally means, “Let’s get back to our sheep.” Baaa!
Sweet and Savory
Lamb with Garlic-Mint Sauce
Growing up lamb was a special dish and we always had it with mint jelly. Have you tasted that jelly lately? You might as well pour sugar directly onto your lamb! Here is a grown-up recipe that I'm convinced you'll love, and of course it has 4 ingredients:
4 Tablespoons of olive oil

3 finely minced cloves of garlic (I like the ease of using the frozen cubes of minced garlic from Trader Joes or the jarred minced garlic.)
4-6 lamb loin chops or lamb chops
2 Tablespoons of mint jelly
Turn the oven on to 200. You then heat the oil in the skillet on medium high. Next sprinkle each side of the lamb chops with garlic salt and once the skillet is super hot add the chops. Cook about 1&1/2 to 2 min. on both sides until each side is browned and has a nice crust. Turn off the pan, cover it, and remove from heat to allow the lamb to cook through. About 3 more min. for lamb loin chops and 2 min. for lamb chops.
BEFORE the chops have reached the desired color inside, remove from the pan, wrap tightly with foil and put in the oven. You then turn the eye on low and return the pan to the heat. Next with a wooden spoon stir in one more tablespoon of olive oil and the garlic into the leftover liquid. Don't forget to scrape the bottom of the pan, so you can get all the yummy stuff. You then stir in the mint jelly long enough for it the liquify. Remove chops from the oven, place on plates, pour sauce over chops and serve immediately.
If you are making 2 batches, cook each batch in the oil before you do the sauce. After your chops are warming in the oven, add 2 more Tablespoons of oil, 6 finely minced garlic cloves, 4 Tablespoons of jam and stir. Pour sauce over lamb and serve immediately.
TRY THEM YOU'LL LOVE THEM!
Made to Order
This is a super easy way to make earrings just how you want them! Here's what you'll need:
Beads (1 to 4 different kinds) Your own jewelry is a great resource. In this case, I cut off a strand of a 3 strand bracelet that I got at TJMaxx.
Head pins
2 earring hooks
2 Jump rings
Step 1. Gather your materials: beads, head pins, earring hook and jump rings.
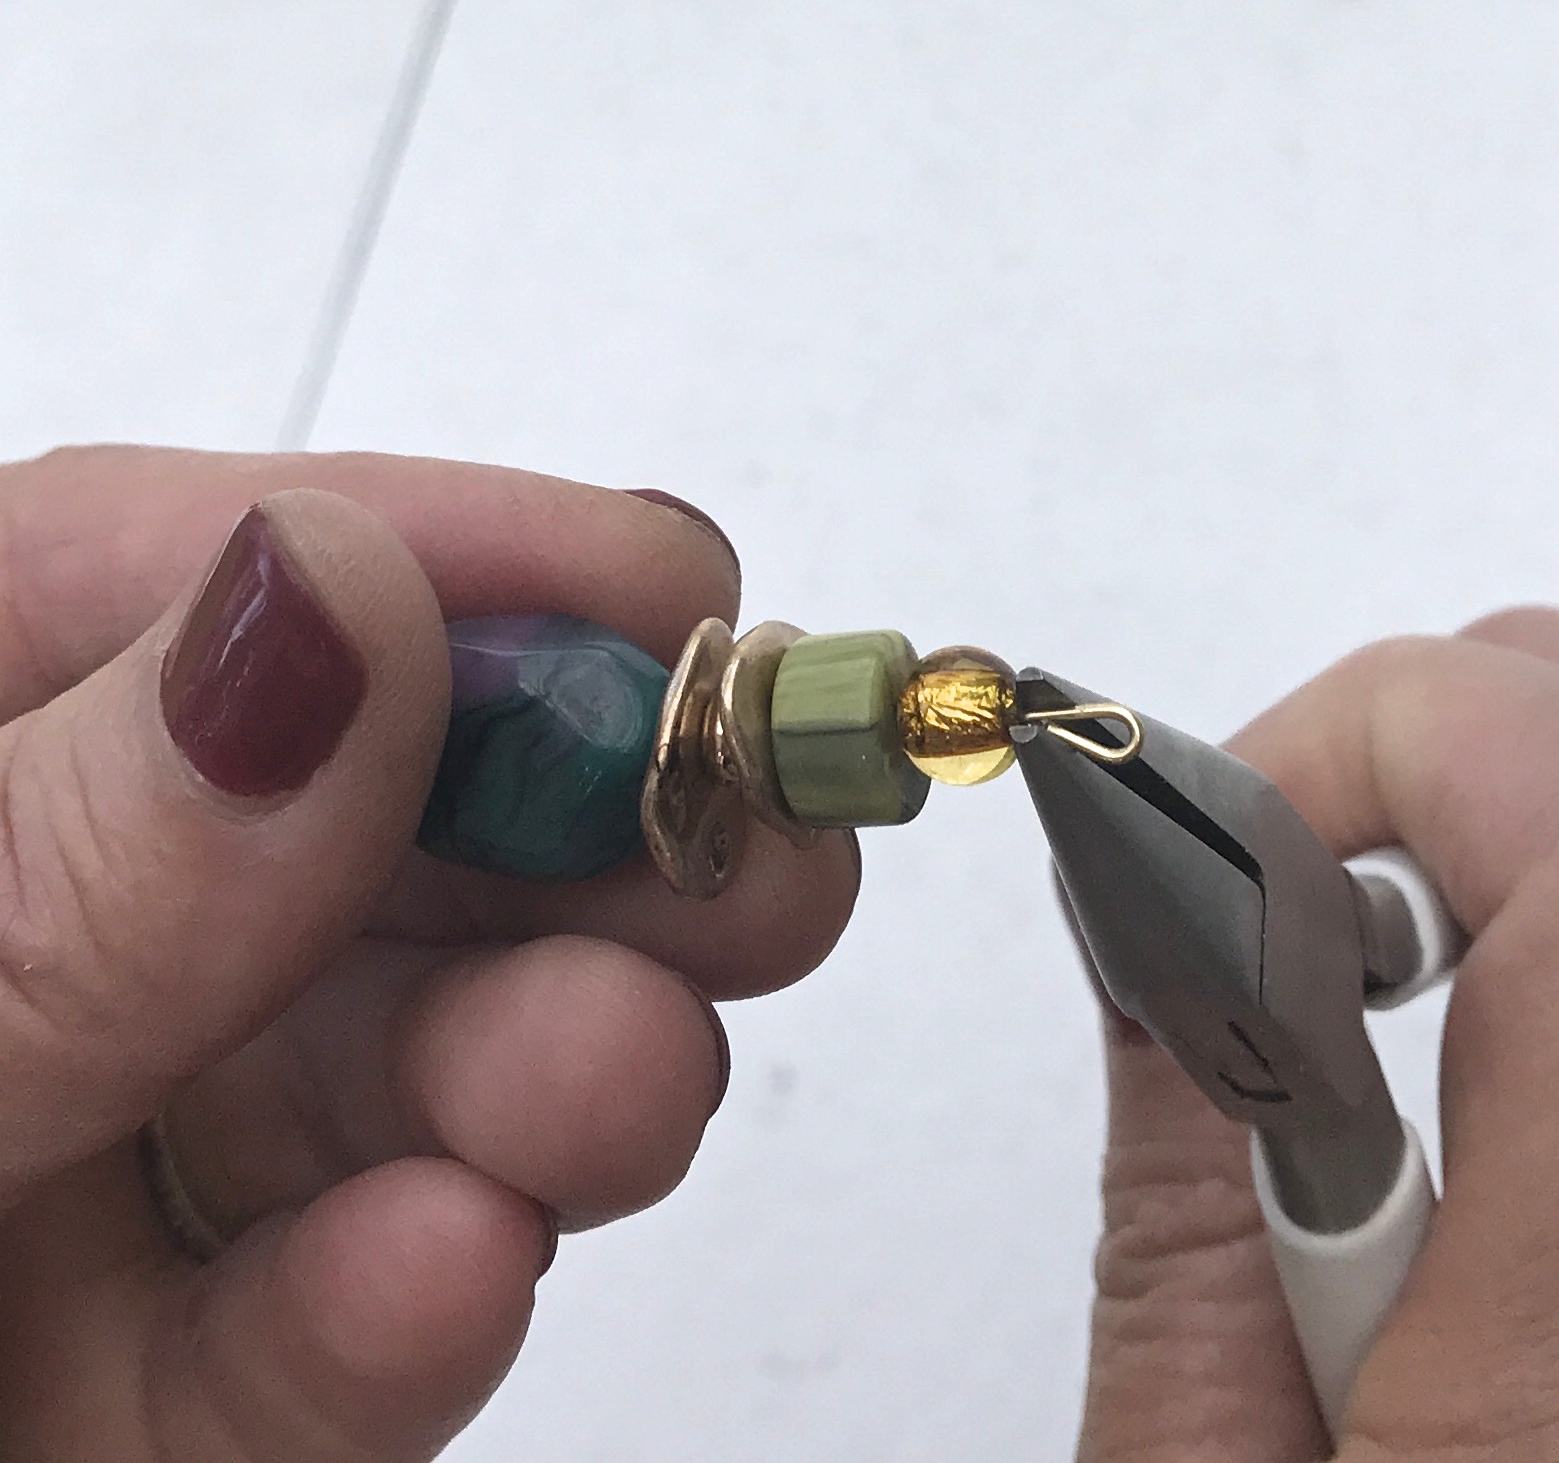
Step 2. First you design your earrings, then you put half the beads on a head pin. Next you snap off the head pin 1/2 inch above the top bead.
Step 3. You then take your rounded needle nose pliers and make a loop.
Step 4. After that you close the loop using your regular needle nose pliers.

Step 1.

Step 2.

Step 3.
Step 4.
Step 5. You then attach your earring hook to the beaded head pin using a jump ring. (See a couple posts ago on working with jump rings.) Now you have a darling pair of earrings that you can wear yourself or give as a gift!

Step 5.


* We will pick back up with simple jewelry making tips after Christmas. The holiday season is upon us!
Fun Saying:
The other day one of my friends said, "That's no skin off my nose." OW Another variation of this quote is also "That's no skin off my back." (OW) And a totally weird variation that makes zero sense is: "That's no skin off my teeth." The only thing I can think of is back when this saying originated people didn't brush their teeth, so they had a layer of scum on their teeth like skin. GROSS!!!
Brussels Sprouts: a main event
As I've admitted before, I'm not a big fan of vegetables. Brussels sprouts especially. Unfortunately, my husband's family has always had them on Turkey Day. (Thank goodness I was raised in the south where they didn't serve anything that healthy for Thanksgiving!) Of course brussels sprouts are Todd's favorite vegetable. Recently he made a brussels sprouts dish that I liked. I actually loved it (Shhh!). Of course, the dish also has potatoes and bacon. Who can't love that? Here's what you'll need:
2 lbs. of brussels sprouts

1 & a 1/2 lbs. of potatoes (We use multicolored fingerling or new potatoes for color.) The purple ones are beautiful inside!
6 strips of bacon
Balsamic reduction or glaze (Rachel Ray makes a great one!)
Pre-Heat oven to 425.
Step 1. Fry the bacon till it is cooked half way. Then cut into bite-sized pieces.
Step 2. Wash the sprouts and cut into large chunks. Next do the same for the potatoes.
Step 3. You then put all 3 ingredients in a large iron skillet or casserole dish and toss with a bit of the bacon drippings, garlic salt and cracked pepper. Cover dish loosely with foil. Roast the dish for 45 to 55 minutes or until you can easily put a fork through the brussels sprouts and potatoes.
Step 4. After you remove the dish from the oven, generously drizzle the top with balsamic reduction.
***At our house we make a sauce with a mayonnaise substitute called Lemonaise from Ojai Kitchen mixed with some crushed garlic and lemon. (You could also use regular mayo with garlic and lemon or a chipotle mayo.) Serves 6 to 8
Cooking Tidbit:
What is the correct spelling Brussels Sprouts or Brussel Sprouts? The answer is both, so you can spell it any way your little heart desires!

Sweet and Blue
This brussels sprouts dish would go perfectly with the spinach salad in Pickett's Pearls blog post called "Sweet and Blue" especially if you add chicken to the salad. (We use the roast chicken from our grocery store. That way things are easy-peasy.)

Elegant, DIY Bracelets
The simpliest way to make a bracelet is by using elastic. Here's what you'll need:
A tape measure
Lots of beads (1 to 3 different kinds). Your own old jewelry is a great resource!
Elastic - size 5 mm ( The thinner elastic stays knotted better.)
GS jewelry glue.
Step 1. Come up with a design you like.
Step 2. Measure your wrist and add an inch. (Elastic bracelets for small wrists are about 7 inches and bracelets for regular wrists are usually 7 and 1/2 inches.
Step 3. Next with the free end of the elastic, start beading. (You'll want the other end of the elastic to be wound around the spool itself.)
Step 4. After you have reached the desired length, cut the elastic with at least 4 extra inches on each side. You then stretch out the elastic and stretch some more.
Step 5. Next you tie a very tight triple knot and put a couple of dots of the glue on the knot. After the glue has dried, cut the elastic and enjoy your bracelet! You may want to do 3 or more bracelets for a more dramatic effect.


Fun Saying
Just the other day I heard my husband say: "If you don't have a seat at the table, you are probably on the menu." I had never heard this one before. I definitely don't want to be on the menu. Do you? We better stay involved!

Iron On
Did you grow up with your mother or grandmother using a cast iron skillet? I know I did, but when the new fangled non-stick teflon pans came out, all iron skillets got the shaft. Now they are back in style and all the rage.
I was curious so I asked my nephew, Chris Nunzita, to explain the big craze. (His creations are below.) He said: 1. They cook the food evenly, so the food in the center doesn't cook faster than the food around the edges. 2. They hold the heat in ; thereby, keeping the food warm even after you turn off the stove. 3. They don't emit harmful chemicals like teflon pans do. They are in fact a healthy source of iron. Hence the "iron" in iron skillet. 4. They are very affordable and they last forever. You could actually will them to your children and grandchildren.
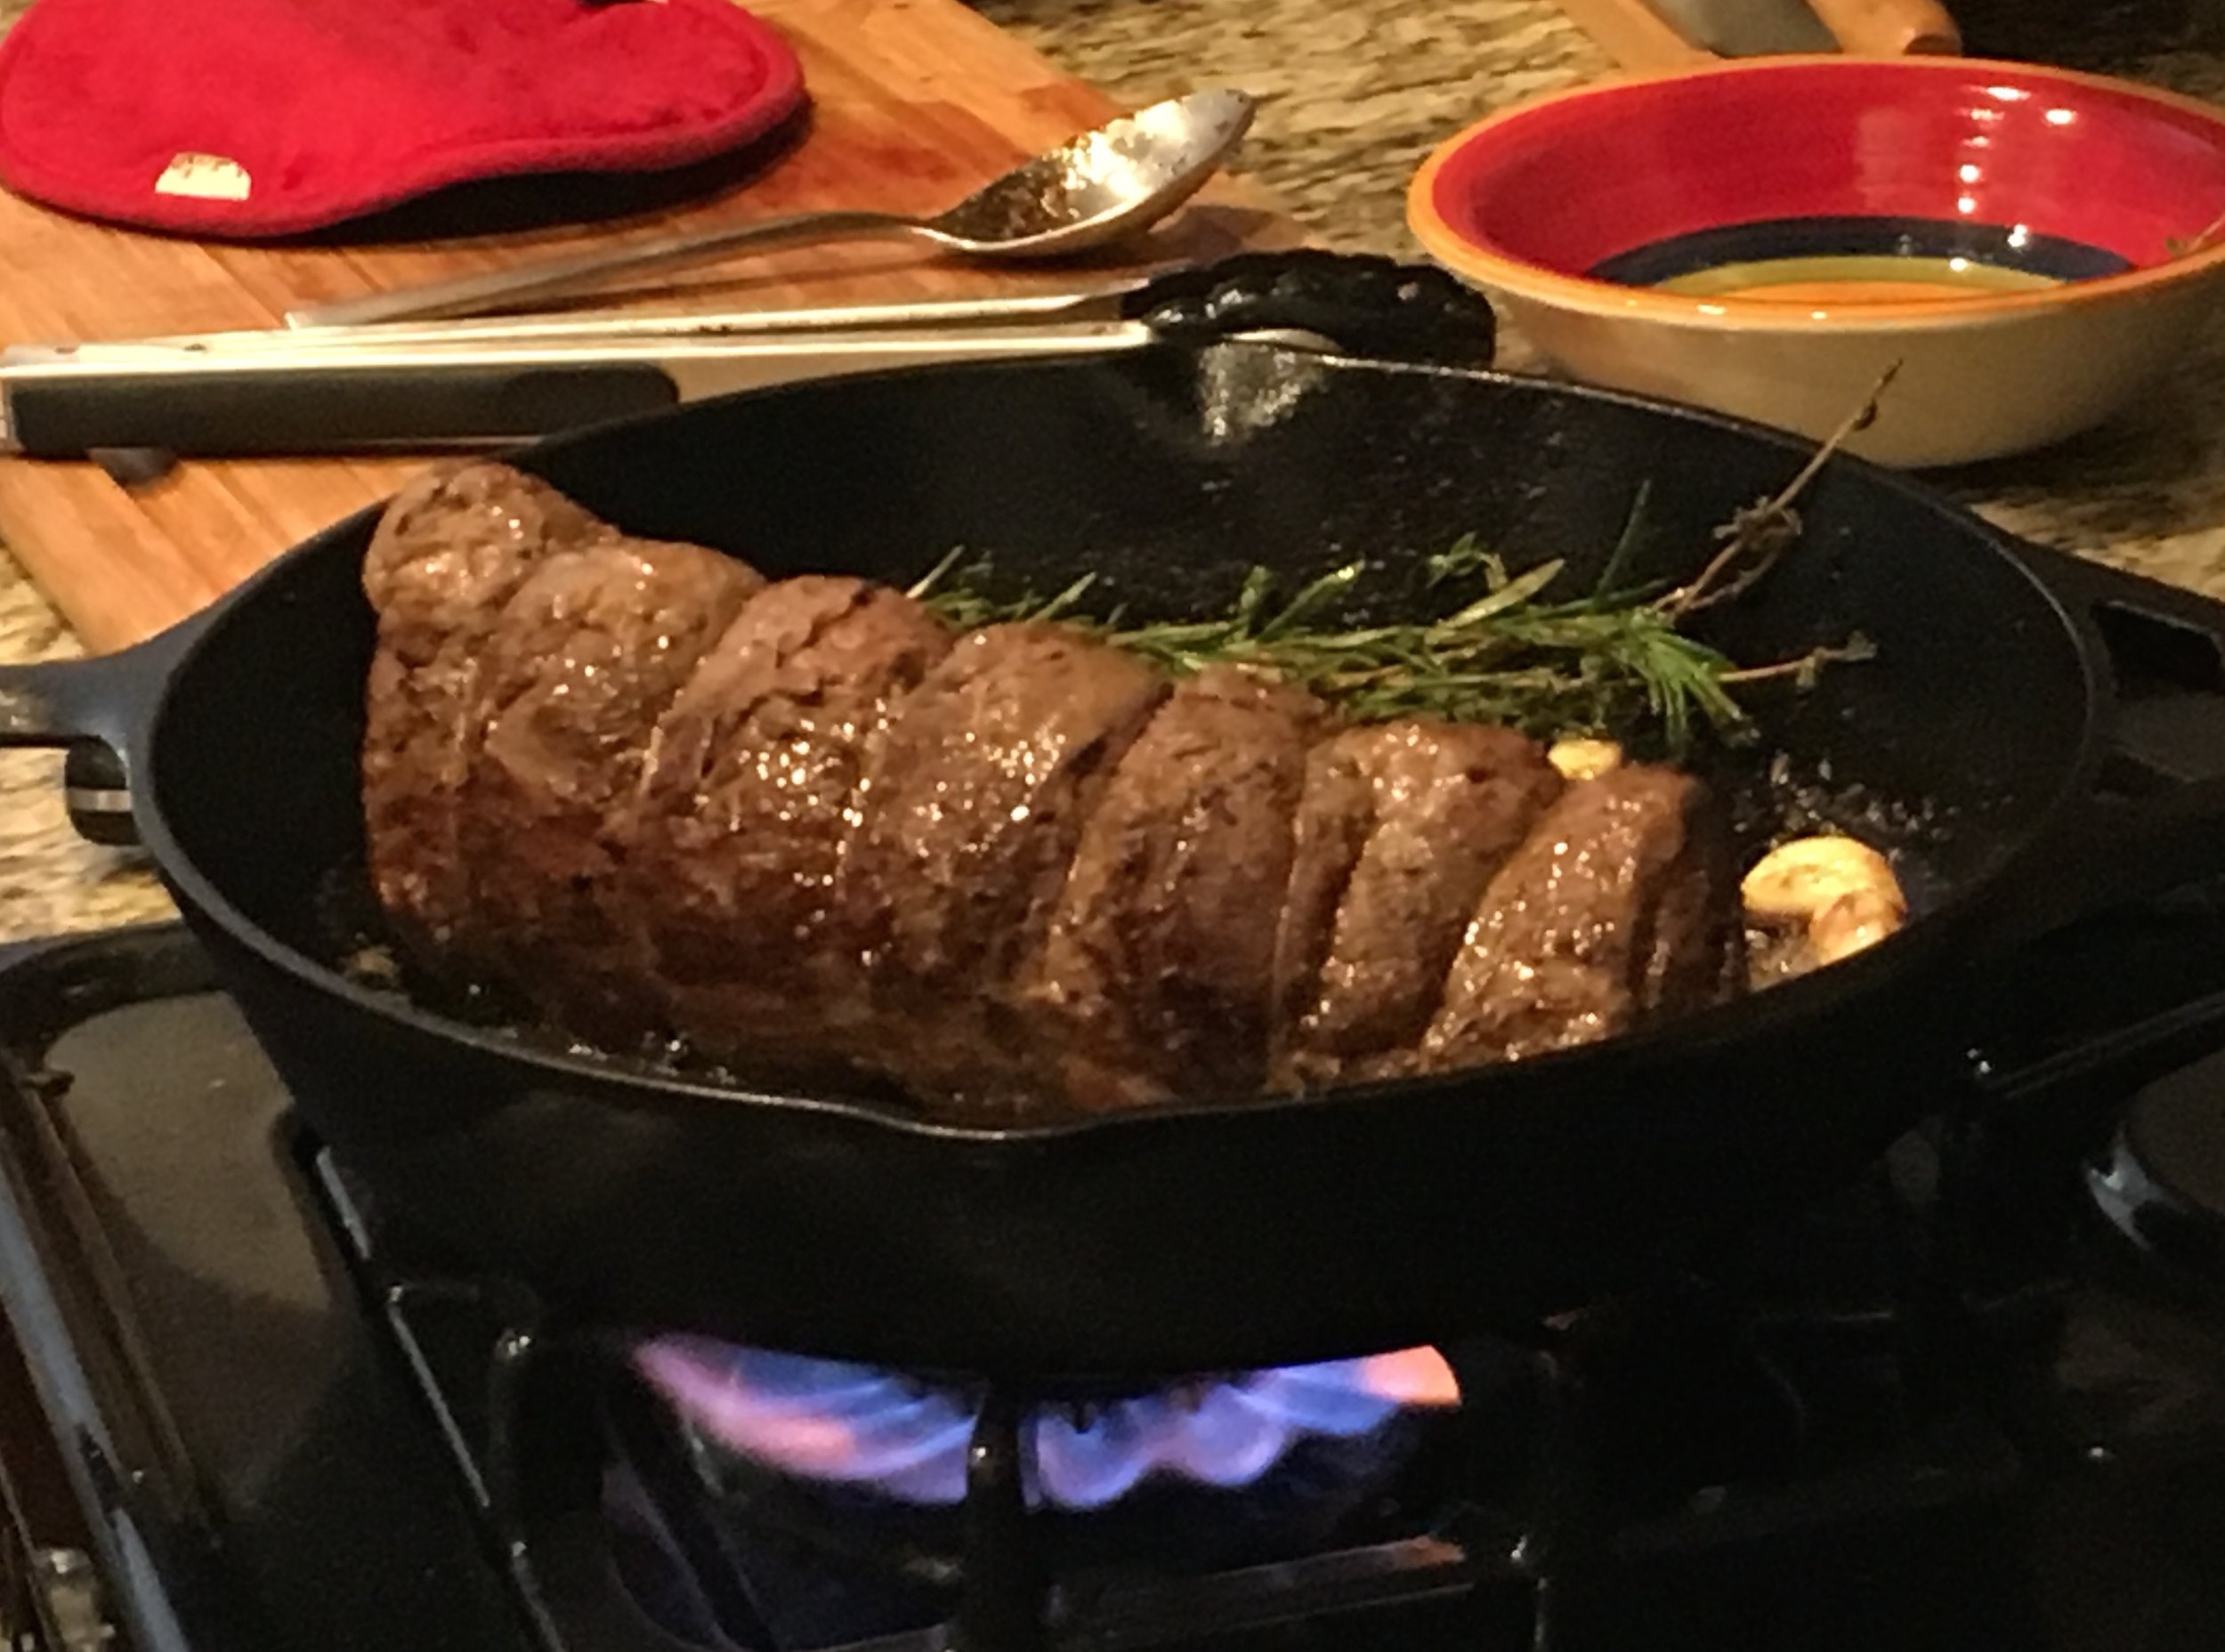
There are also iron grills. My good friend Lara Lanfried uses hers everyday to cook anything from Pancakes in the morning to steaks at night. She never even puts her's away! One of her favorite things to make on her iron grill is what she calls "Skillet Steak". Here's what you'll need:
1 Lb of Tri Tip
1/3 cup of olive oil
2 Tablespoons of red wine

Cut the tri tip into 2 inch pieces then place in a large baggie with olive oil, red wine, sea salt& pepper. Marinate meat anywhere from a few hours to overnight. When ready to cook, melt some butter over high heat and add the meat. (High heat will sear or brown the outsides.) Cook on each side on high for 2&1/2 to 4 minutes or until just before inside of steak reaches your desired degree of pink. Simply mouth-watering!

Beer?
Linda who is my favorite checker at Ralph’s gave me this tri tip marinade recipe:
2 lbs. of tri tip
1/2 cup of your favorite beer
1/4 cup of soy sauce
2 teaspoons of fresh garlic
(Opt. 1 teaspoon of fresh ginger)
She mixes all the ingredients and adds the mixture to the tri tip pieces in a large plastic bag. She then lets the meat marinade for 2 to 3 days. (I guess it’s almost impossible to marinade meat for too long.) Finally she barbecues it or cooks it in an iron skillet. Linda says that it’s the alcohol in the beer that tenderizes the meat. I have since talked to others who marinate their steak in beer. Go figure.
Try it You'll Love It!
Fun Saying
My childhood friend, Bradley, (She was the first girl in history that had a boy's name, and believe it or not my other good friend was named Gregg.) I've gotten way off track. Anyway Bradley recently reminded me of the saying, "I put a bug in his ear." Gross!!!!!! I can just envision a cock roach climbing into someone's ear. The saying means to plant a thought into someone's head. Now isn't there a better way to put that?
The Perfect Veggie-Packed Pesto Pizza
My husband, Todd, came up with this veggie pizza recipe years ago and we have had it over and over and it doesn't get old. The good news is it's super, super easy. This pizza is another way that makes veggies attractive for those who are a little less than enthusiastic about 'em. Here's what you'll need:

2 small gluten-free pizza crusts or 1 large pizza crust. (We use Udi's)
A container of fresh pesto (If you want the pizza to be vegan, you can buy or make dairy-free pesto)
A can of artichoke hearts
1/2 package of grape tomatoes
Optional: Greek olives and/ or roasted zucchini, yellow squash, eggplant, red onion
Cover the top of the pizza crusts with about 2 tablespoons of pesto. (Trader Jo's is the favorite around the Pickett household.) Then drain the artichokes hearts and cut them into small pieces. Next cut the baby tomatoes (and any other veggies you are going to use) into small pieces. You then cover the the top of the pizzas with the veggies and cook as directed on the pizza crust package. You may be thinking "Cheese-less! what's the point?" Try it and you'll see surprisingly that it's better sans cheese.
Cooking Tidbit: The main difference between roasting and baking is that with roasting the temperature is 400 or over; therefore, roasting has more of a browning and dehydrating effect.
Organize Organically
Every year the EWG (Environmental Working Group) comes out with a list of produce that we should buy organic and produce we don't have to. I wrote about fruits in my recent blog, titled "All American Trifle". With fruits there seems to be a rule of thumb that those with hard skins (or inedible skins) have much less pesticides than those that don't. With vegetables there isn't as much rhyme or reason. For instance: white potatoes have been found with lots of pesticides while sweet potatoes haven't. Regular corn has more pesticides than sweet corn. Go figure.
Some of the Foods You Should Buy Organic:
Celery, tomatoes, leafy greens such as spinach and lettuce, potatoes, peppers of all kinds and cucumbers


Some of The Foods You Don't Need To Buy Organic:
Onions, asparagus, sweet corn, eggplant, sweet potatoes and cauliflower


