
I can't help it. I have to do another taste test. I'm addicted. The first taste test I hosted was in my 20s when I worked at Diedrich Coffee. I invited a bunch of my friends over and did a blind coffee taste test. Sumatra won, by the way.
Well this time it's hummus. Who doesn't like hummus? I decided to do a hummus taste test featuring the classic Trader Joe's hummus, the classic Costco/Ralph's grocery store hummus and my 4-ingredient Pickett's Pearls hummus. My goal was to try to see which store brand was better and then make a "better than the store" hummus using just 4 ingredients. The first four batches didn't amount to much (except a lot of dirty dishes).

However, I was NOT giving up. Finally on my last try it all came together. In a blind taste test, my family picked my hummus first before (2nd) Costco's/Ralphs brand (Sabra) and (3rd) Trader Joe's!!!!!
My efforts had paid off and it was time to take things on the road. Even with a larger group the results were the same. So, you wanna make really good 4-ingredient hummus? Here's what you'll need:
1 can of garbanzo beans well drained - liquid set aside
1/3 cup of tahini unstirred so you can get some of the oil. (My family boycotts any humus I make unless it is Trader Joe's. Other tahinis, even Joyva, have a bitter aftertaste.)
1/4 cup of fresh lemon juice + 1 Tablespoon
3 garlic cloves crushed (the easiest form of garlic are those little frozen cubes from Trader Joe's or crushed garlic in a jar.)
Using a food processor, add the tahini, lemon juice, garlic, a level 1/2 teaspoon of salt and 5 cranks of cracked pepper, then blend well (30 secs. or so). Then add 1/2 the garbanzo beans and again blend well. Next add the second 1/2 half of the beans and 3 tablespoons of the garbanzo liquid and again blend well. Finally, add 3 tablespoons of water then blend until ultra smooth (two minutes or more.) Use this time to clean-up because you have just made a bit of a mess.
*Check out my friend Nanette's blog post on Mediterranean Nachos. Her blog is called "At Home with the Loverbees": The sweet, real, and fun life of a family enjoying food, faith, homeschooling, crafting, and country living.

**This homemade humus would go marvelously with Middle Eastern Turkey/Zucchini Meatballs! See the Pickett's Pearls blog post "A Taste of Jerusalem" from last February.
Jewels Beautiful Jewels
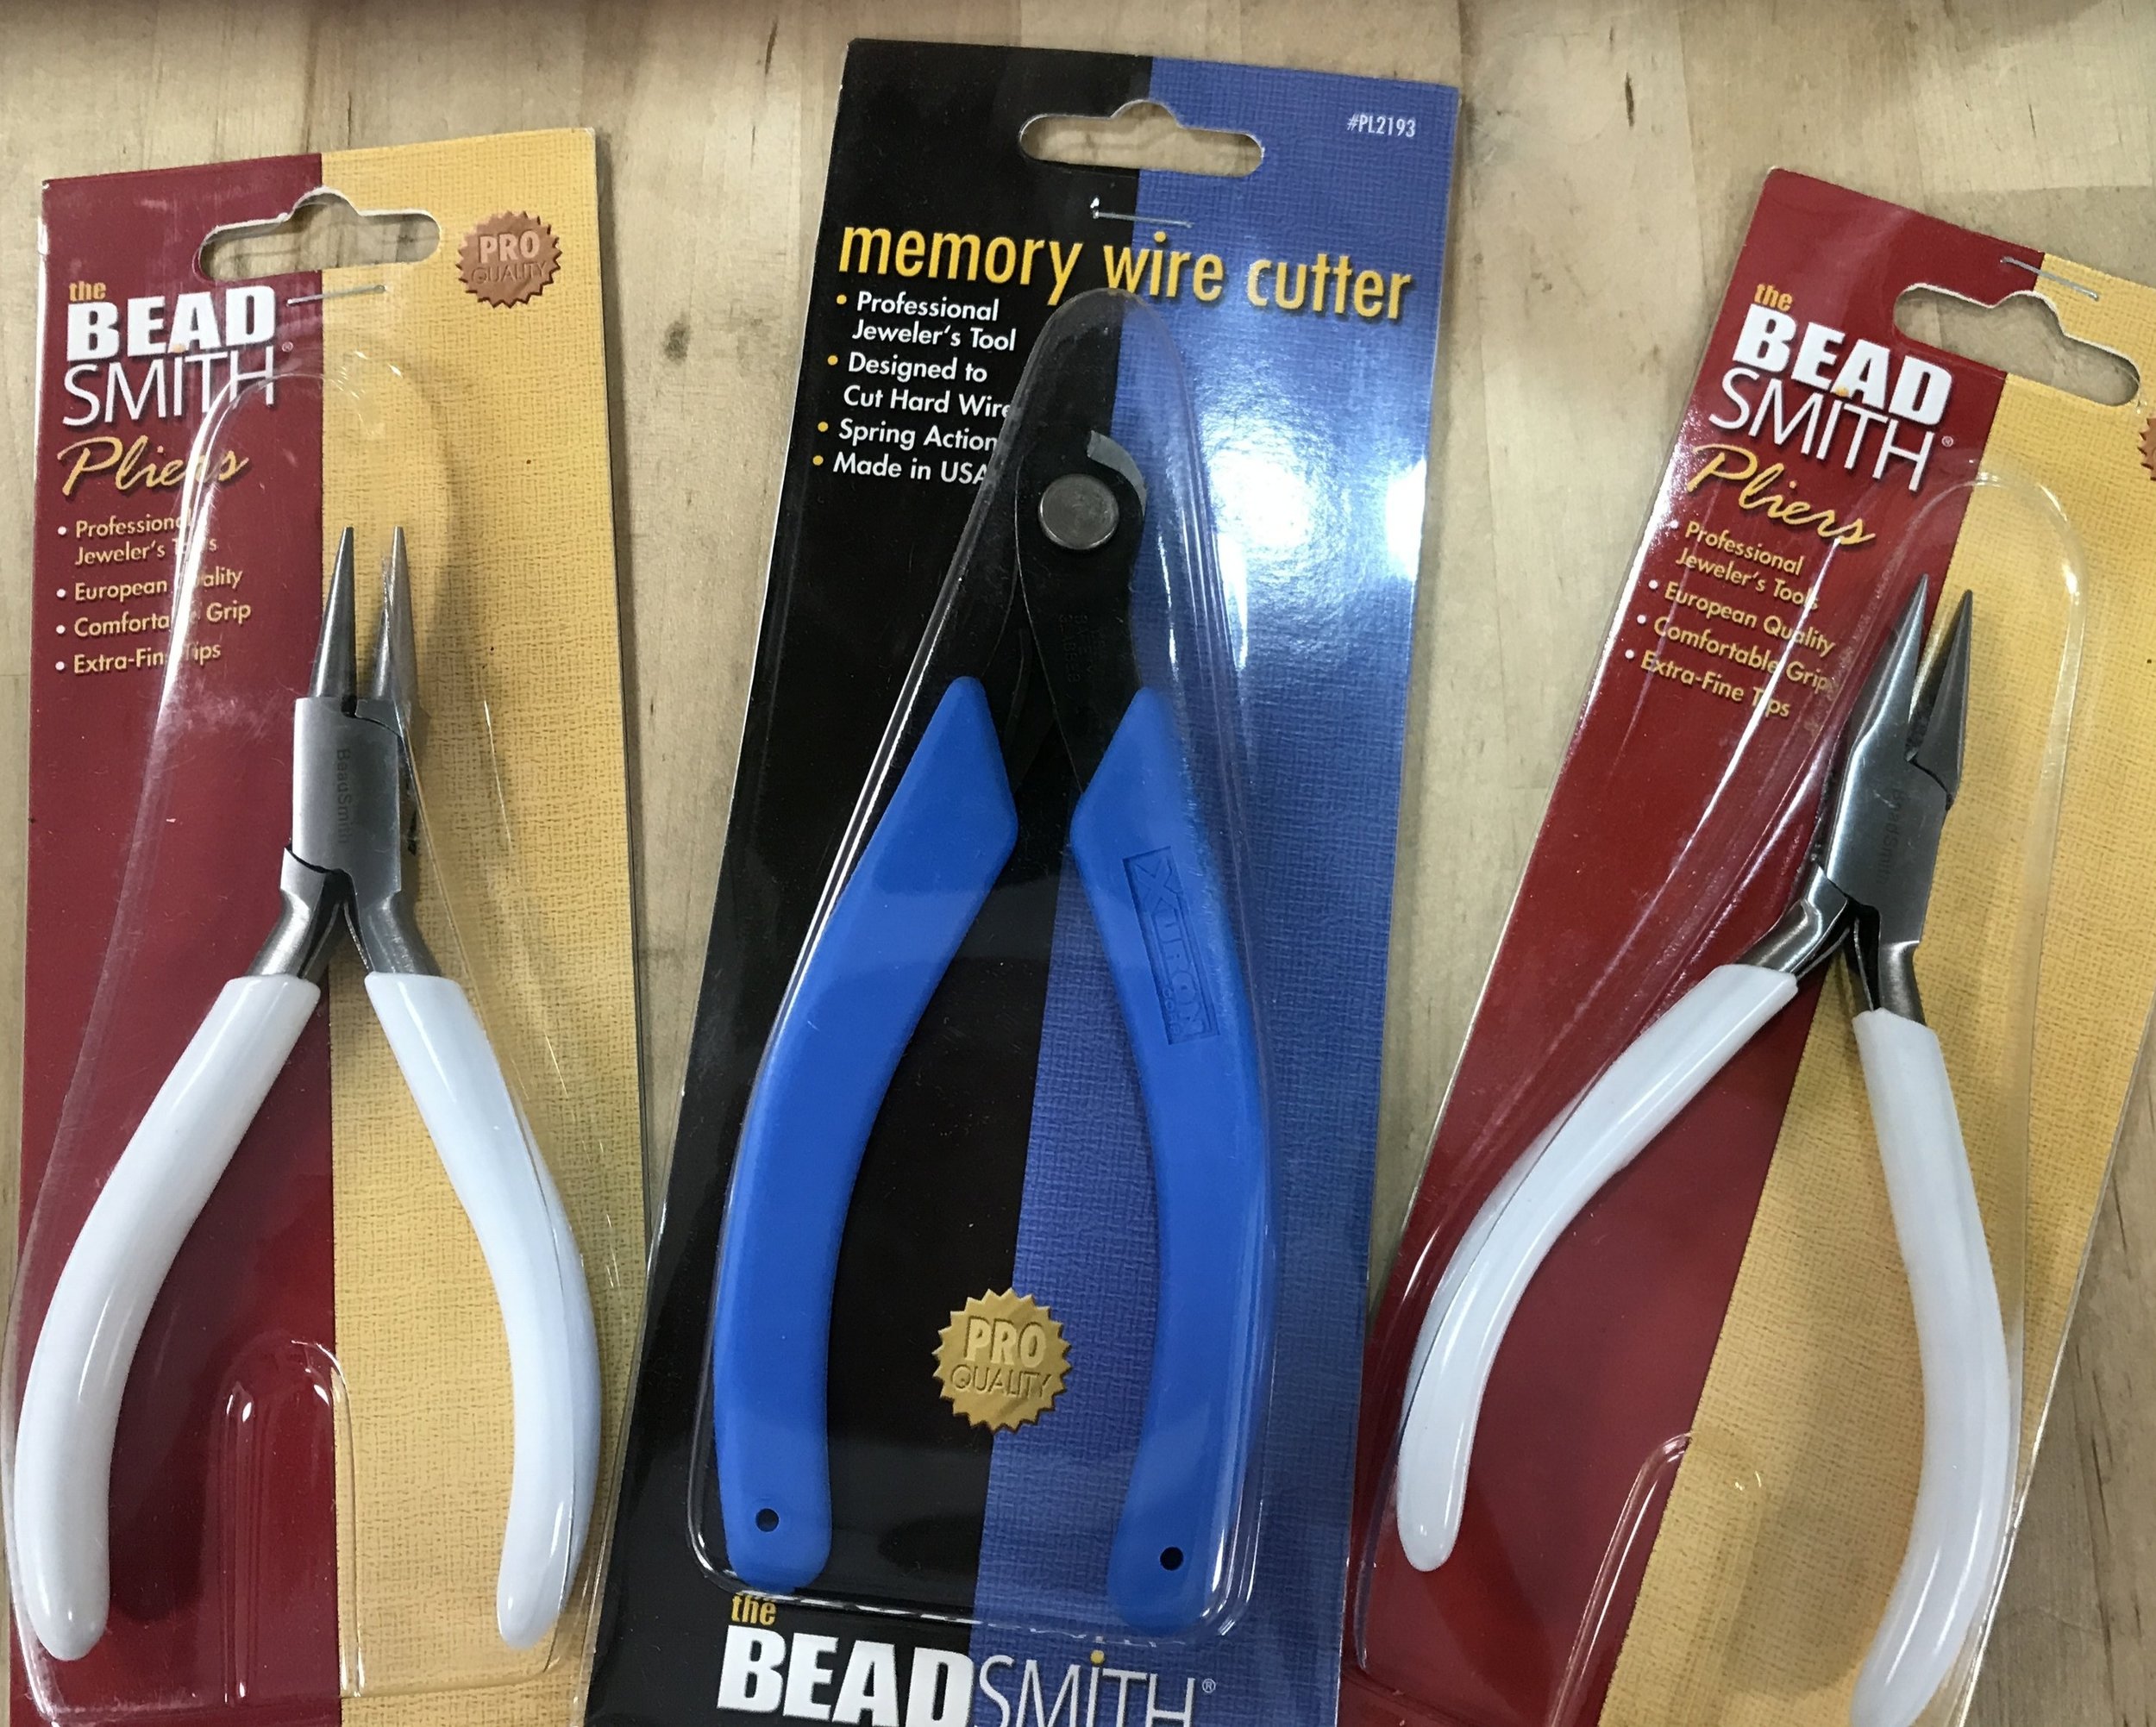
I've been making jewelry so long that I can't even remember where I learned how. Right off the bat I got a small pair of round needle nose pliers, a small wire cutter and a small pair of regular needle nose pliers and those are all the tools I've ever needed. Jewelry making has been an awesome creative outlet for me. Everyone in my family drew and painted like Leonardo DaVinci, so for me to be good at something creative felt awesome. Not surprisingly, I would love to share some jewelry making skills with you.
The first skill we will be focusing on is shortening or lengthening pieces that we already have. (The jewelry we already have is one of our best resources when it comes to jewelry making.)
For instance, below is a pair of earrings that I have never worn because they are too long for me. So I’m going to take my two pairs of pliers and open the jump ring or connector ring at it’s natural break, and twist the pliers in opposite directions. Once I remove the bottom diamonds and connector rings I will have a pair of earrings I’ll actually wear!


Next I’m going to take a long necklace, which I’ve never worn and turn it into a bracelet. First I wrap it around my wrist and then measure (count) how many beads I need to remove. Then I remove the section of beads I don't need by using my two pliers to open the connector rings on each end of the section.
Next I take one part of a clasp and add it to one end again using my pliers. Then I add the second part on the clasp to the other end. Finally, I wrap it back around my wrist, clasp it and voila! I have a fun dangly bracelet.


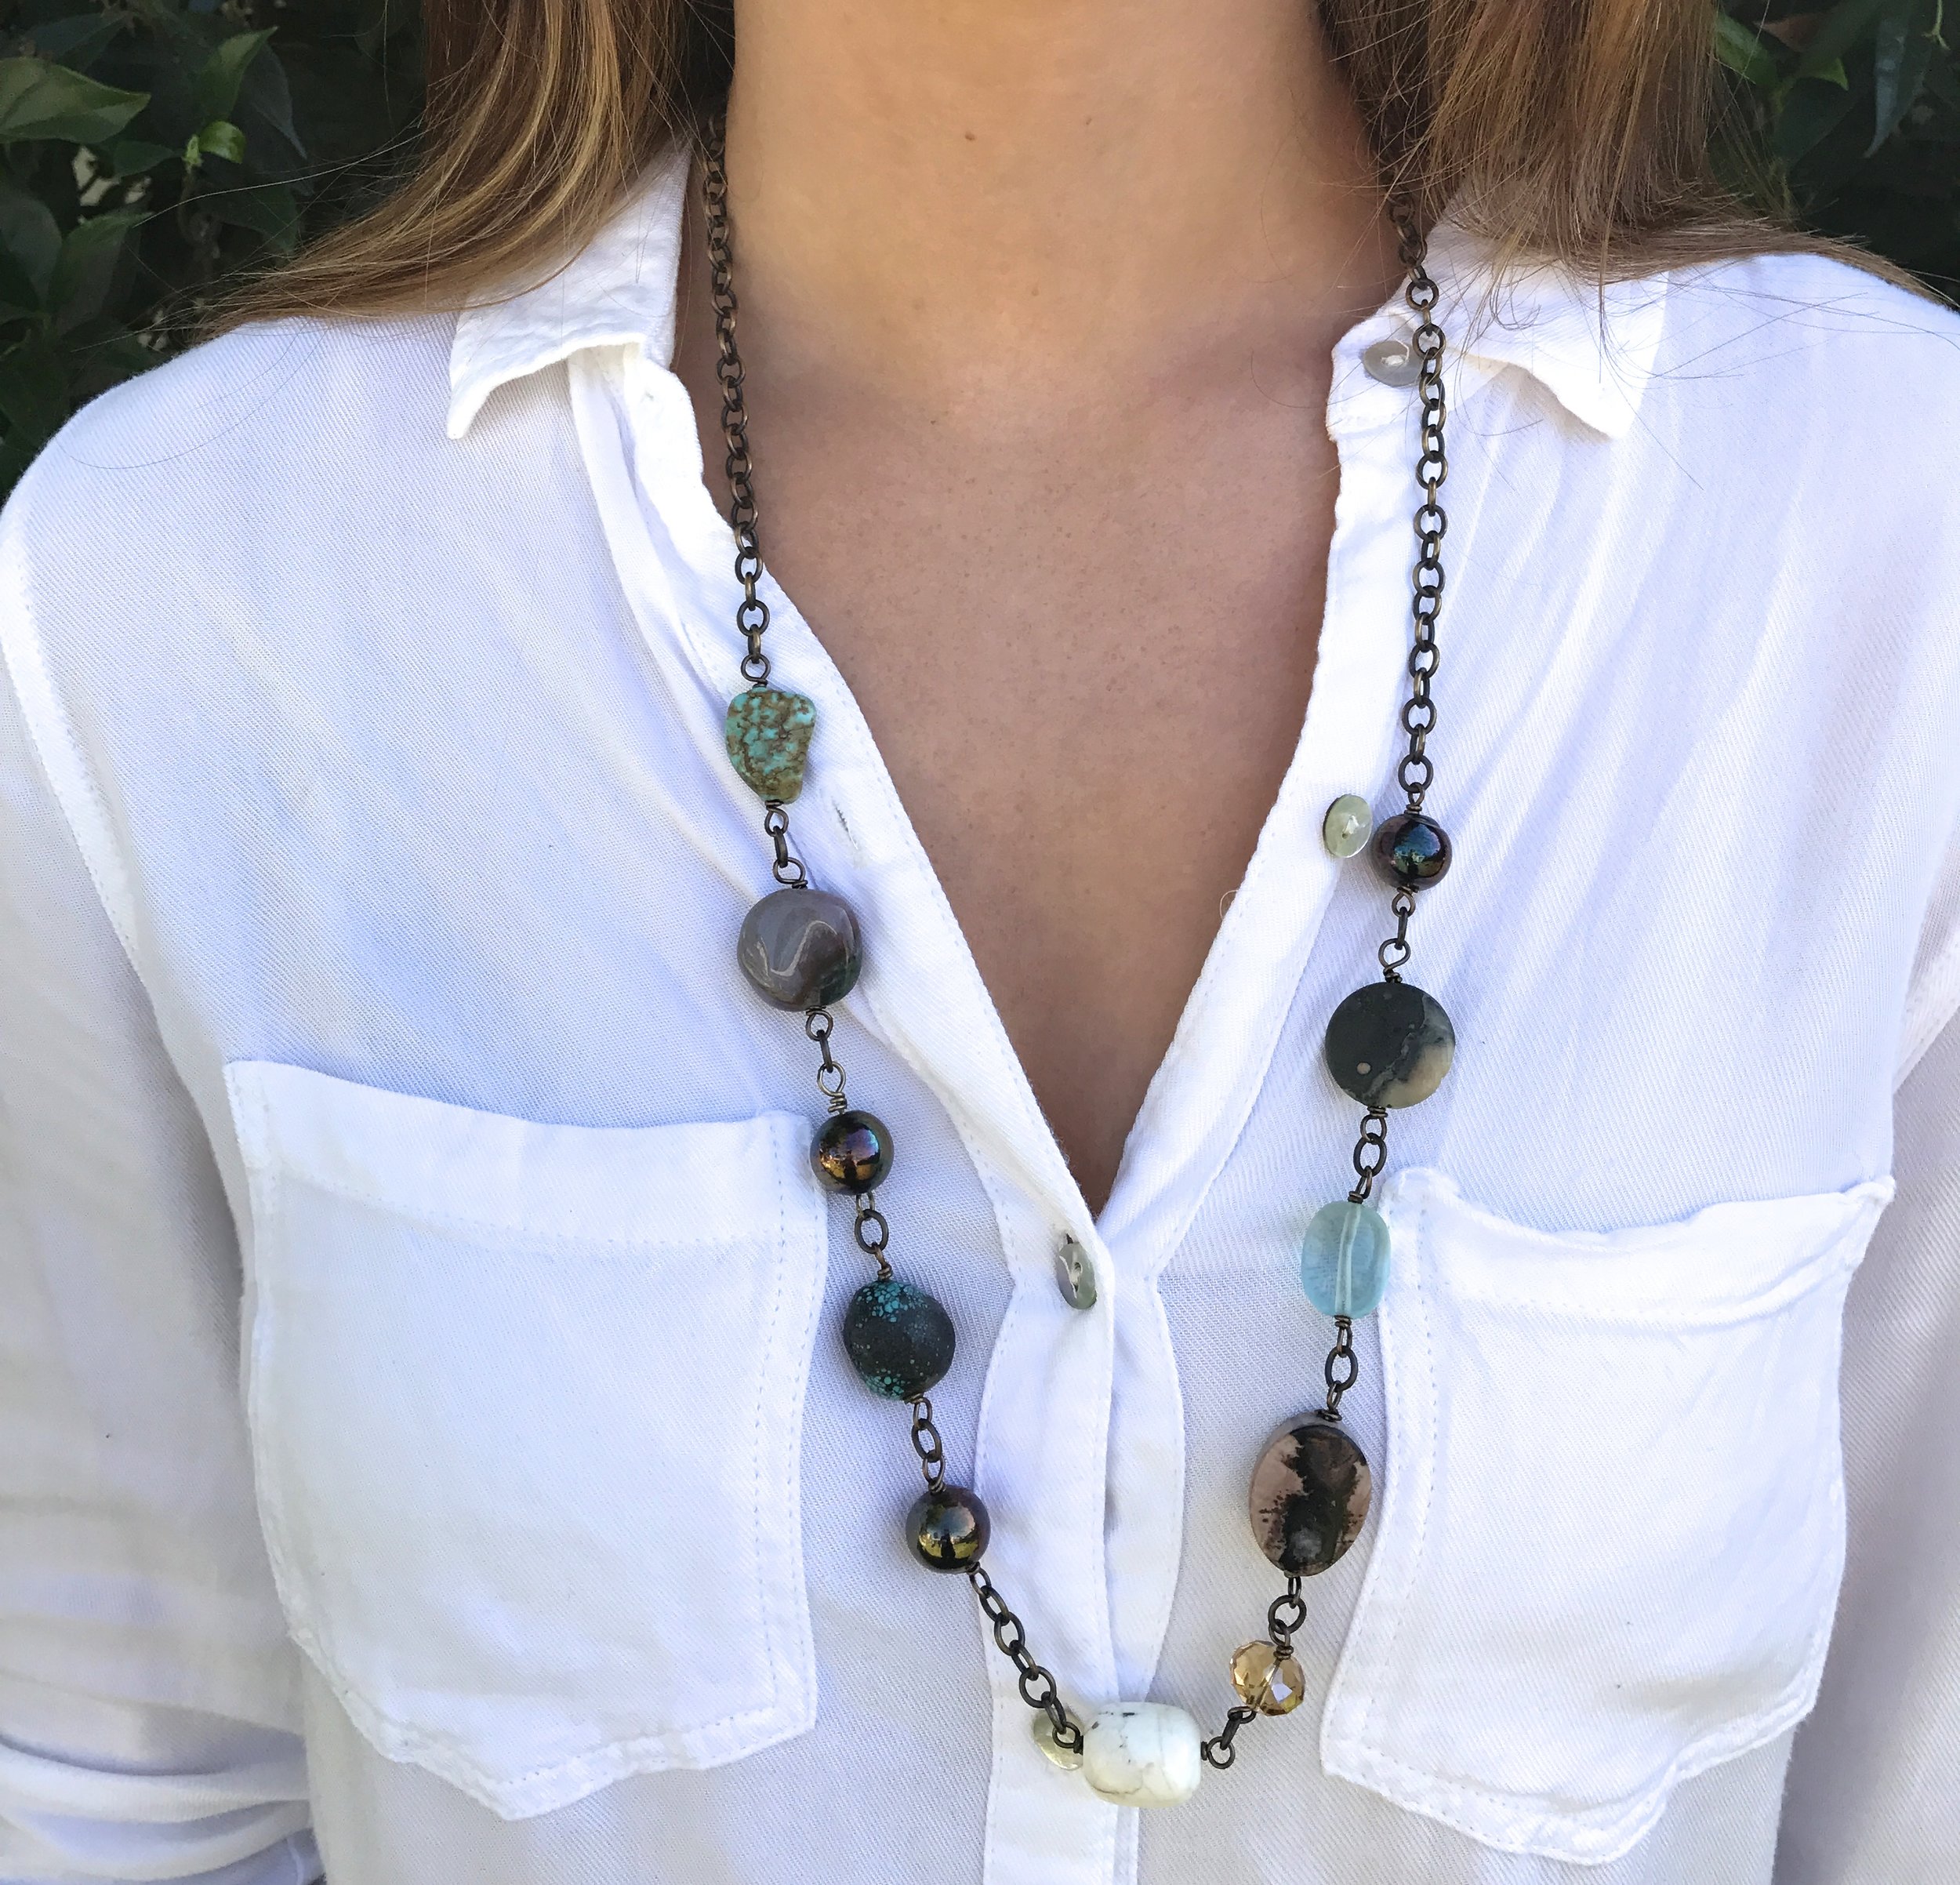
Finally I’m going to take a beautiful long necklace that I don’t wear much anymore and shorten it. After I have figured out how much chain to remove, I use my two pairs of pliers to shorten the necklace by opening one of the jump rings.
After I have removed the extra chain, I close the jump ring. (You will probably have to work with it a little to close it tight.) This necklace already has a clasp, so there is no need to add one. Now I have a beautiful short necklace. (I always keep any left over parts of jewelry that I remove, so if I want to add them back or make something else out of them I can.)


In the following weeks we will focus on : making elastic bracelets, making earrings and using crush beads and wire to make bracelets and necklaces.
*New Pickett's Pearls posts are now every other Wednesday. Subscribe below so you will know when a new post is out!